Inside, you’ll find the best CS2 settings for FPS that even pros trust; battle-tested in real matches, and cleared of every recycled myth.
Best CS2 Video Settings for Maximum FPS
Achieve the perfect balance between visual clarity and buttery-smooth performance. These best CS2 video settings have been tested across various systems to deliver optimal results.
| Setting | Recommended Value | FPS Impact |
|---|---|---|
| Display Mode | Fullscreen Essential | +5-10% |
| Global Shadow Quality | Low or Medium | +10-20% |
| Shader Detail | Low | +5-15% |
| Particle Detail | Low | +5-10% |
| Boost Player Contrast | Enabled Pro Choice | -1-2% |
| Wait for Vertical Sync | Disabled | Reduces input lag |
| Multisampling Anti-Aliasing | CMAA2 (low-end) or 2x MSAA | +5-20% |
Advanced Video Settings: Fine-Tuning for Performance
| Setting | Recommended Value | Impact | Competitive Note |
|---|---|---|---|
| Boost Player Contrast | Enabled | Minimal FPS cost | Improves player visibility at distance. |
| Wait for Vertical Sync | Disabled | Reduces input lag | Use only for cinematic capture, not competitive CS2. |
| Multisampling Anti-Aliasing | CMAA2 or 2x/4x MSAA | Moderate cost | CMAA2 is fastest; 2x MSAA clearer through railings/fences. |
| Global Shadow Quality | Low/Medium | +10–20% FPS possible | Keep Dynamic Shadows to “All” for crucial info. |
| Model / Texture Detail | Low/Medium | +5–10% FPS | Medium preserves clarity; Low maximizes frames. |
| Shader Detail | Low | +5–15% FPS | Less eye-candy; smoother during smokes and molotovs. |
| Particle Detail | Low | +5–10% FPS | Reduces visual clutter in nades and explosions. |
| Ambient Occlusion | Disabled | Small FPS gain | Purely cosmetic. Disable for competitive CS2. |
| High Dynamic Range | Performance | Small FPS gain | “Quality” can look cleaner but costs frames. |
| FidelityFX Super Resolution | Disabled | Blurry at cost of clarity | Only consider on low-end PCs; hurts enemy spotting. |
PRO TIP
Always test your FPS before and after making changes! Use the command cl_showfps 1 in the console to display your current frame rate, or use a third-party tool like MSI Afterburner for more detailed monitoring.
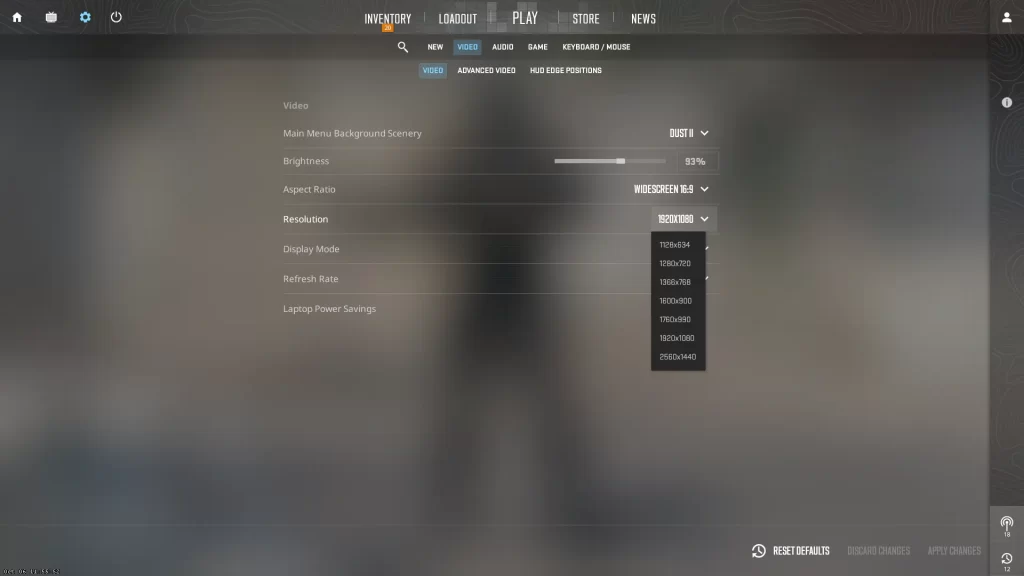
CS2 Pro Settings: Aspect Ratio and Resolution Guide
The eternal debate continues: native resolution or stretched 4:3? Let’s break down the pros and cons of each option to help you make an informed decision.
| Setting | Pros | Cons | Used By |
|---|---|---|---|
| 16:9 (1920×1080) |
• Widest field of view • Sharpest image quality • Modern, crisp look |
• Models appear smaller • Lower FPS than 4:3 • Can be distracting |
~30% of pros S1mple, NiKo |
| 4:3 Stretched (1280×960, 1024×768) |
• Player models appear wider • Higher FPS • Feels “faster” horizontally |
• Reduced horizontal FOV • Distorted visuals • Missing peripheral vision |
~70% of pros ZywOo, device |
| 16:10 (1680×1050) |
• Middle ground between 16:9 and 4:3 • Good balance of FOV and model size • Less stretching than 4:3 |
• Uncommon, less supported • Not as wide as 16:9 • Not as focused as 4:3 |
~10% of pros karrigan, ropz |
PRO TIP
To create a custom 4:3 resolution like 1280×960, you’ll need to set it up in your GPU control panel (NVIDIA Control Panel or AMD Radeon Software) before it appears as an option in CS2.
My recommendation? Start with your monitor’s native resolution (likely 1920×1080 at 16:9), then experiment with 1280×960 stretched (4:3) to see if you prefer the wider player models. Give each setting at least a few days before switching, it takes time for your brain to adjust to the different visual feel.
For a deeper look at resolution and aspect ratio options, check out our complete CS2 resolution guide.
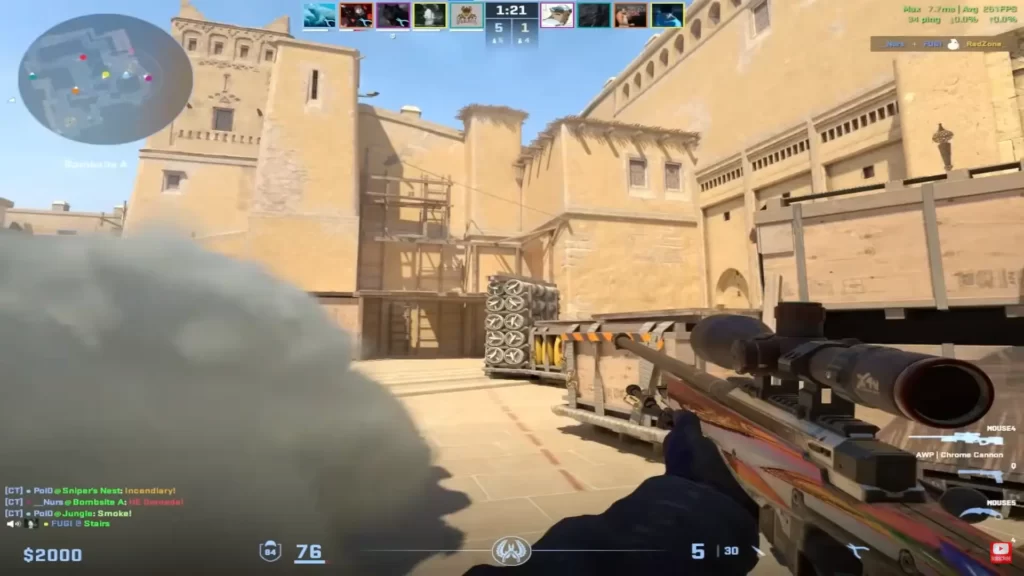
Best CS2 Settings for Visibility
Can’t see that sneaky CT in the shadows? Perfect visibility settings help you spot players faster, react quicker, and avoid those frustrating “I didn’t even see him!” moments.
| Brightness | 100-130% |
| Boost Player Contrast | Enabled |
| Multisampling AA | 2x or 4x |
| Texture Quality | Medium |
| Shader Detail | Low |
| Motion Blur | Disabled |
| FidelityFX SR | Disabled |
| Monitor Refresh Rate | 144Hz+ |
| Digital Vibrance | 70-100% |
| Monitor Game Mode | Enabled |
| Black Equalizer | 10-15 |
| Monitor Preset | FPS/Gaming |
| Dynamic Range | Full (0-255) |
| Color Mode | Computer Monitor |
PRO TIP
The biggest visibility boost comes from increasing Digital Vibrance in your GPU settings. For NVIDIA, right-click desktop → NVIDIA Control Panel → Adjust Desktop Color Settings → Digital Vibrance → 70-100%. For AMD, use the Saturation slider in Radeon Software.
Remember that visibility settings are highly personal and depend on your monitor, lighting conditions, and even your eyesight. Don’t be afraid to experiment until you find what works best for you!
For an in-depth guide to locking in enemies more easily, check out our dedicated CS2 sensitivity settings guide.
If you’re using an NVIDIA GPU, you should pick your best settings based on that.
Mastering CS2 Audio Settings
In CS2, your ears are just as important as your eyes. Hearing footsteps, weapon reloads, and grenade pins can give you crucial information about enemy positions before they appear on screen.
| Setting | Description | Optimal Value |
|---|---|---|
| Main Menu Volume | Controls the volume of menu music | 0-20% |
| Round Start Volume | Music played at the beginning of rounds | 0-10% |
| Round Action Volume | Background music during gameplay | 0% (Off) |
| Round End Volume | Music played when round concludes | 10-30% |
| MVP Volume | Music for MVP announcements | 10-50% |
| Bomb/Hostage Volume | Volume of bomb and hostage sounds | 100% |
| Ten Second Warning | Volume of bomb countdown warning | 100% |
| Death Camera Volume | Music played after you die | 0-10% |
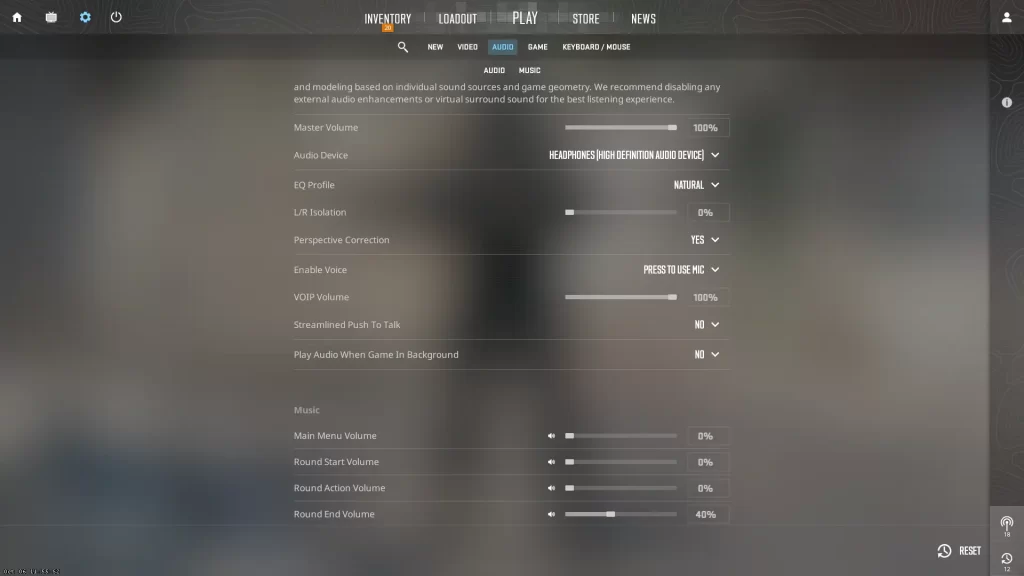
In-Game Audio Settings (Compact)
| Setting | Recommended | Notes |
|---|---|---|
| Master Volume | 50–100% | Set so footsteps are clear without clipping. |
| EQ Profile | Natural or Crisp | Natural = balanced; Crisp = boosted mids/highs for footsteps. |
| L/R Isolation | 0% or 50–70% | 0% = realistic positioning; 50–70% = CS:GO‑like separation. |
| Perspective Correction | Yes (Enabled) | Audio rotates with your view; improves directional accuracy. |
| VOIP Volume | 40–70% | Teammates audible without masking game cues. |
PRO TIP
The best headphone setup for CS2 is a quality pair of stereo headphones with any virtual surround features disabled. CS2’s built-in HRTF audio processing works best with pure stereo output.
Want to master every aspect of CS2’s sound system? Check out our complete CS2 audio settings guide for advanced techniques and console commands.
Perfecting CS2 Mouse Settings
Your mouse settings are perhaps the most personal aspect of your CS2 configuration. Finding the perfect sensitivity is like discovering your gaming soulmate, when it clicks, you just know.
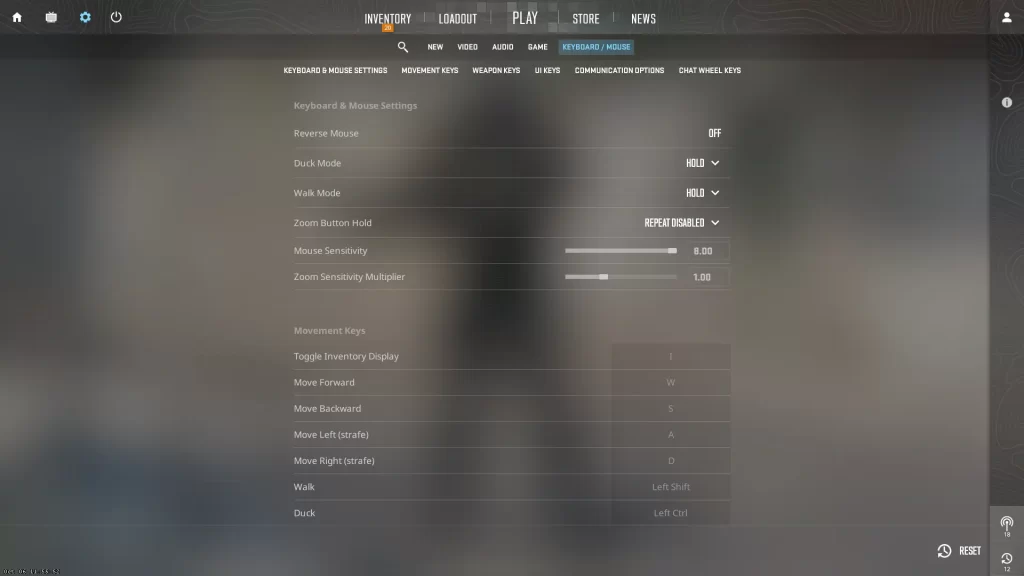
Finding Your Ideal DPI and Sensitivity
| Setting | Recommended | Why |
|---|---|---|
| DPI | 400 or 800 | Industry‑standard steps that keep tracking predictable. |
| In‑Game Sensitivity | 0.7–2.5 | Common pro range; tune for control vs. speed. |
| eDPI | DPI × Sensitivity Aim for 600–1200 |
Comparable feel across setups (e.g., 400×2.0=800, 800×1.0=800). |
| Zoom Sensitivity | 1.0 (default) | AWPers often use 0.8–1.0 for finer control. |
Essential Mouse Settings
Mouse Acceleration
DisabledMouse acceleration makes your cursor move farther based on speed. This creates inconsistency that makes building muscle memory nearly impossible. Always disable for consistent aim.
Raw Input
EnabledBypasses Windows mouse processing and reads directly from hardware. CS2 has this enabled by default and it cannot be disabled, ensuring the most direct and consistent mouse input.
Polling Rate
1000HzHow often your mouse reports position. 1000Hz (1ms) is the standard. While newer mice offer 4000Hz+, these can cause performance issues in CS2 and aren’t widely recommended yet.
Zoom Sensitivity
1.0Multiplier for sensitivity when scoped. Most pros use 1.0 default, but AWPers sometimes use 0.8-1.0 for more precision when holding angles.
Pro Player Mouse Settings
ZywOo
Team Vitality
s1mple
NAVI
NiKo
G2 Esports
m0NESY
G2 Esports
Notice how even among top players, there’s significant variation in sensitivity preferences. Don’t just copy your favorite pro’s settings, find what works best for your playstyle!
Check out our complete CS2 mouse settings guide for detailed instructions on finding your perfect sensitivity.
Best CS2 Crosshair Settings
Your crosshair is your constant companion in CS2, it’s literally the center of your gaming experience. Finding a crosshair that suits your playstyle can dramatically improve your accuracy and consistency.
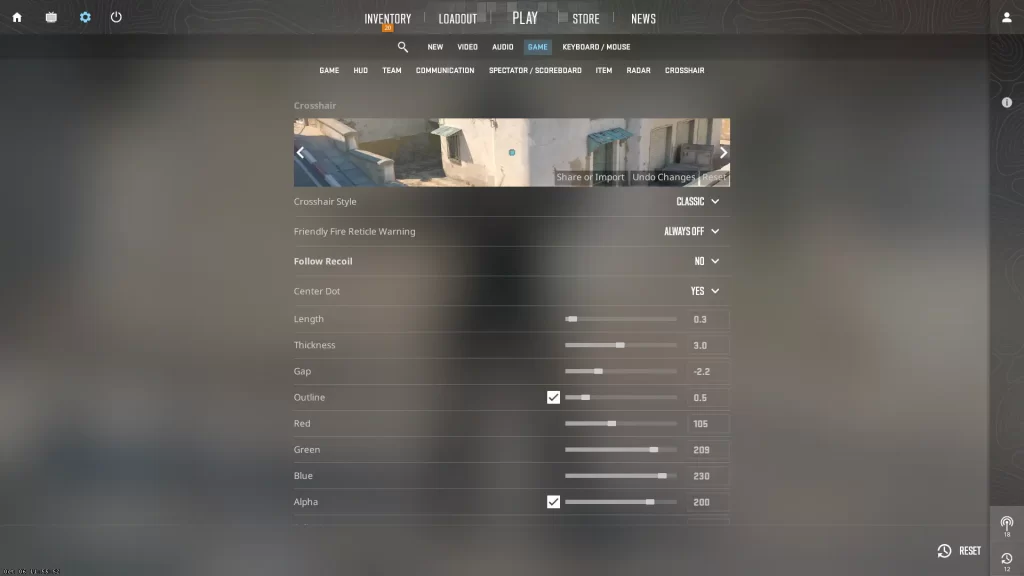
Customizing Your Crosshair
Crosshair Style
• Style 0: Classic static crosshair
• Style 1: Default dynamic (expands with movement/shooting)
• Style 2: Classic dynamic
• Style 3: Classic static with dynamic dot
• Style 4: Classic static with accurate split (most popular)
• Style 5: Classic static with a dot
Pro recommendation: Style 4 or 0 for consistency
Crosshair Color
• Green: High visibility on most maps (most popular)
• Yellow: Good contrast, stands out well
• Cyan: Excellent visibility on Dust2
• Pink/Purple: Unique colors that stand out
• Red: Can blend with blood spatters
• White: Very visible but can be lost on bright surfaces
Pro recommendation: Green or cyan
Size and Gap
• Length: How long each line extends (1-3 recommended)
• Thickness: How thick the lines are (0-1 recommended)
• Gap: Space in center (-3 to -1 for no gap, 0-3 for visible gap)
• Outline: Black border around crosshair (0 = off, 1 = on)
Pro recommendation: Small crosshairs with minimal gap
Center Dot
• Enabled: Provides precise aiming point, helpful for tapping
• Disabled: Cleaner look with less obstruction
• Size: Adjusts dot size (1-2 recommended if enabled)
Pro recommendation: Most pros disable the center dot
PRO TIP
CS2 uses a code system to easily share crosshairs. To copy a pro’s crosshair, just enter their code in the game’s crosshair settings menu. You can also share your own crosshair by generating a code!
Pro Player Crosshair Codes
| Player | Team | Crosshair Code | Color |
|---|---|---|---|
| ZywOo | Vitality | CSGO-ywh69-Ys549-BMc7Y-79HEq-J6sKG |
Green |
| s1mple | NAVI | CSGO-S7jsW-zcE8j-zLCvH-9fJsY-f3YfB |
Yellow |
| NiKo | G2 | CSGO-OjCsj-aAWYy-WCzAZ-wOCJj-sLu3A |
Green |
| device | Astralis | CSGO-3W8tO-3nHFz-GHu8Y-OKwYT-qzfYF |
Green |
| m0NESY | G2 | CSGO-GC7fH-3kTnE-jkczH-DsSF8-c3A4M |
Green |
| ropz | FaZe | CSGO-Qaknn-wCZDj-Vvqpn-2uiUt-jD3nG |
Green |
Remember that crosshair preference is highly personal. What works for one player might not work for another. Try different styles and find what feels most comfortable for your playstyle.
For more crosshair codes and detailed customization options, check out our complete CS2 crosshair settings guide.
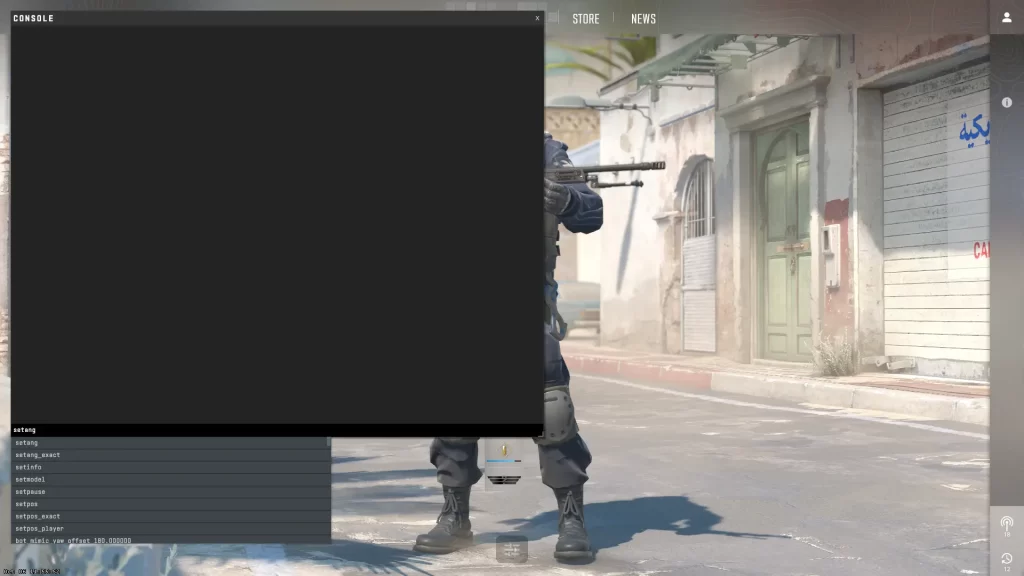
Working with CS2 Launch Options
Launch options are special commands that optimize performance before the game even launches. With CS2’s move to Source 2, many old CS:GO options no longer work. Let’s separate the functional from the outdated.
Essential Launch Options
To set your launch options:
- Open Steam
- Right-click on “Counter-Strike 2” in your library
- Select “Properties…”
- Find the “Launch Options” text field
- Enter your desired options, separated by spaces
| Command | Function | Recommendation |
|---|---|---|
-console |
Enables developer console on launch | Essential |
-high |
Sets CS2 to high CPU priority | Test on your system |
-fullscreen |
Forces exclusive fullscreen mode | Recommended |
-nojoy |
Disables joystick/controller support | Recommended |
+fps_max 0 |
Removes FPS cap for unlimited frames | High-end PCs |
+fps_max 240 |
Caps FPS at specified value | For G-Sync/FreeSync |
-allow_third_party_software |
Allows OBS and similar apps | Only if streaming |
-vulkan |
Forces Vulkan API instead of DirectX | Test individually |
Outdated Launch Options to Remove
These CS:GO options no longer work in CS2 and should be removed:
- -novid: Non-functional in CS2
- -tickrate 128: Only affects offline servers
- -d3d9ex/-disable_d3d9ex: CS2 uses DirectX 11
- -threads: CS2 handles this automatically
- +cl_forcepreload 1: Can cause instability
- -freq/-refresh: CS2 detects this automatically
PRO TIP
Less is more with launch options. Only use what you understand and have tested on your system. Too many launch options can cause conflicts or unexpected behavior.
Want to explore more advanced launch options and console commands? Check out our complete CS2 launch options guide.
System-Level Optimization for CS2
Beyond in-game settings, optimizing your operating system and GPU settings can further enhance CS2 performance. Here are crucial tweaks to consider.
- Power Management Mode: Prefer Maximum Performance
- Low Latency Mode: On (Ultra for high-end CPUs)
- Texture Filtering, Quality: High Performance
- Vertical Sync: Off (unless using G-Sync)
- Threaded Optimization: On
- Preferred Refresh Rate: Highest Available
- Digital Vibrance: 70-100% for better visibility
- Radeon Anti-Lag: Enabled
- Radeon Chill: Disabled
- Radeon Boost: Disabled
- Radeon Image Sharpening: Disabled or 50%
- Wait for Vertical Refresh: Always Off
- Texture Filtering Quality: Performance
- Surface Format Optimization: Enabled
- Color Saturation: 70-100% for visibility
- Power Plan: High Performance
- Game Mode: Test enabled vs disabled
- GPU Scheduling: Test on your system
- Windows Update: Keep up to date
- Background Apps: Close unnecessary
- Startup Programs: Disable via Task Manager
- Windows 11: Enable “Optimizations for Windowed Games”
- Update GPU Drivers: Get latest game-ready drivers
- Disk Cleanup: Remove temp files regularly
- SSD Installation: Install CS2 on SSD
- RAM Management: Ensure 16GB+ RAM
- Monitor Settings: Use gaming preset
- Shader Cache: Clear occasionally
- Network: Use wired connection
PRO TIP
If you’re experiencing stuttering in CS2, try forcing shader precompilation through Steam. Open Steam, press CTRL+SHIFT+ESC to bring up the console, then type “shader_build 730” to rebuild the shader cache properly.
Frequently Asked Questions
How do I optimize my CS2 for maximum FPS?
Lower your CS2 graphics settings for FPS like shadows and shaders, use fullscreen, disable V-Sync, and close background apps. Set Windows to High Performance, update GPU drivers, and add launch options like -high +fps_max 0 for smoother gameplay.
What are the best CS2 resolution and aspect ratio settings?
1280×960 (4:3 stretched) is the setting most used by CS2 pros due to larger player models. 1920×1080 (16:9) gives wide FOV. 1680×1050 (16:10) offers a balanced option. Test each to find what feels best for your aim and vision comfort.
How can I make CS2 run smoother?
Lower in-game graphics settings such as shadows, textures, and effects to boost FPS. Disable V-Sync, enable NVIDIA Reflex (if supported), and close background applications. Updating GPU drivers and using Windows “Game Mode” can also reduce stuttering and input lag for a smoother experience.
Should I use high or low DPI for CS2?
Use 400 or 800 DPI. What matters is eDPI (DPI × sensitivity). Most players stay between 600–1200 eDPI. Start with 800 DPI and 1.0 sens (800 eDPI) as a good baseline, then tweak based on your playstyle and movement comfort.
What is the best polling rate for CS2?
A 1000 Hz polling rate (1 ms) offers the best balance of responsiveness and CPU overhead for most players. Only consider 2000 Hz-4000 Hz if you have a high-end CPU and notice zero stutter in stress tests.
Does forcing Vulkan improve CS2 performance?
On some systems -vulkan can deliver smoother frame-times, while others see no change or even a loss. Benchmark a full match with and without the flag—keep whichever yields higher averages and better 1 % lows.
Is Reshade or colour-filter software safe to use?
Third-party injectors such as ReShade are not whitelisted for CS2 and could trigger VAC. Stick to built-in GPU tools (NVIDIA Digital Vibrance, AMD Saturation) for colour tuning.


 Tradeit.gg Blog | CS2, CS:GO, Rust, TF2 & Dota 2")