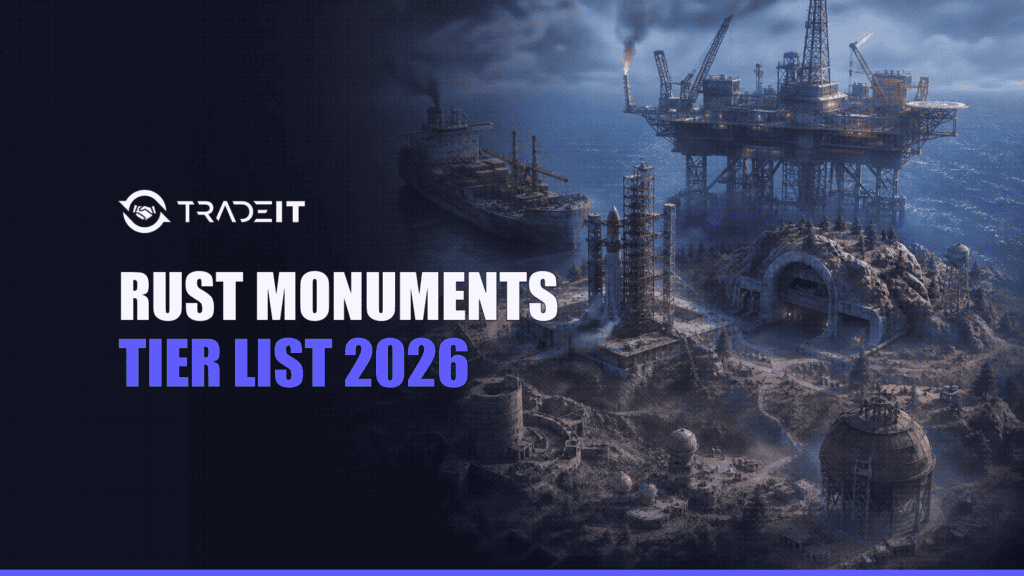


Large Oil Rig is the best overall Rust monument in 2026, but it is not the best monument for every player. Cargo Ship, Launch Site, Nuclear Missile Silo, and Military Tunnels complete S tier; solos often progress faster by living near Underwater Labs, Ferry Terminal, Radtown, Dome, Sewer Branch, or Power Plant instead.
This ranking covers the current procedural-map roster, including 2026’s Deep Sea content and Apartment Complex. It judges monuments by how strongly they advance a wipe, how consistently they can be run, how survivable the route is, and whether the value scales from solo to clan play. It deliberately does not repeat recycler counts, exact crate lists, radiation values, or keycard walkthroughs; those mechanics belong in the separate reference article.
Scope: these verdicts assume vanilla Rust on a normal procedural map. Server population, map seed, wipe length, and distance from your base can move any monument by roughly one tier. A B-tier monument two grids from home usually beats an A-tier monument on the opposite coast.
The short answer before the full list
Use the overall tiers to choose a territory, then apply the solo, group, and wipe-phase adjustments later in the article.
Alias check: Missile Silo and Nuclear Missile Silo are the same monument. This article lists it once under the current endgame verdict.
How This Tier List Works (Ranking Criteria)
The 2026 meta rewards monuments that create real progression pressure, not merely places with lots of containers. Blueprint Fragments pulled players back into medium, large, and endgame monuments, while the reset changes made keycard routes more dependable even when fights continue nearby. The ranking therefore weighs five factors:
How strongly a successful run advances workbenches, gear, and control of the wipe.
How often the monument is available, worth revisiting, and useful across different map seeds.
How readable the approaches are, how many exits exist, and whether a bad fight can be reset.
Travel, transport, clear time, and how much value is lost when the route fails.
Whether the monument works for solos, small groups, clans, or only one specialist setup.
The weights create the overall list. A specialist playstyle can still move a monument one tier: Excavator rises for clans, while Ferry Terminal and Underwater Labs rise for solos.
| Tier | What the verdict means |
|---|---|
| S tier | Wipe-changing. Contest it when your team can reasonably extract. |
| A tier | A route anchor. Excellent value with one meaningful limitation. |
| B tier | A workhorse. Strong when nearby, familiar, or suited to your team size. |
| C tier | A transition stop. Useful early, but rarely worth a long detour. |
| D tier | Niche or on-path utility. Build a plan first; do not default here. |
| F tier | Skip as a progression destination. Stop only for immediate local utility. |
Safe zones are excluded from S–F because shops, transport, housing, and social utility cannot be compared fairly with contested progression routes.
S Tier: Endgame Jackpots
S-tier monuments can change the wipe in one successful run. They offer the strongest combination of endgame progression, repeatable relevance, and server-wide strategic pressure – but every one of them can also erase a full kit when extraction goes wrong.
High-tier routes are also where protective outfits stay on screen the longest. For cosmetic inspiration – not mechanics – see Tradeit’s roundup of the best Rust hazmat suit skins.
Large Oil Rig
Best for: Geared groups; elite solos
Large Oil Rig remains the best overall Rust monument in 2026. Its ceiling is wipe-changing, its reset matters to the whole server, and a clean run can replace several ordinary land loops. It also creates the clearest test of whether a team can control an approach, survive a counter, and extract under pressure.
Why it is not higher: The February 2026 scientist patrol boats make the approach more punishing and reduce the margin for solo recovery. That does not knock Large Oil out of S tier; it does make it a worse recommendation for inexperienced solos than its raw reward suggests.
Cargo Ship
Best for: Groups that can mobilize quickly
Cargo Ship is S tier because it compresses progression, PvP, mobility, and extraction into one moving event. A successful run can leapfrog several normal monument cycles, and the mobile route forces teams to make fast decisions instead of holding one predictable entrance.
Why it is not higher: Its weakness is consistency: the event must be active, the route may be inconvenient, and losing transport can turn a winning run into a donation. When the timing lines up, however, Cargo is one of the few monuments worth abandoning an otherwise good route to contest.
Launch Site
Best for: Groups and clans
Launch Site is the strongest fixed land anchor in this Rust monuments tier list. It stays relevant from the first serious gear sets to late-wipe PvP, supports several entry and exit plans, and rewards teams that can manage wide sightlines instead of relying on one hallway.
Why it is not higher: The same visibility that gives Launch tactical depth also makes every long movement readable to rivals. It is usually controlled by the strongest nearby group, so proximity is valuable only when your team can contest the territory rather than merely live under it.
Nuclear Missile Silo
Also known as: Missile SiloBest for: Disciplined duos and groups
Nuclear Missile Silo – shown as Missile Silo on current maps – is the biggest mover in the 2026 ranking. Its red-keycard repositioning and advanced Blueprint Fragment access turned an already dangerous corridor monument into a compact endgame progression target.
Why it is not higher: Silo wins on value per minute, not safety. Forced corridors make the clear readable, but they also make exits easy to watch. Teams that treat the run as finished before they are back outside are exactly why Silo produces so many reversals.
Military Tunnels
Best for: Prepared duos and groups
Military Tunnels earns S tier as the most dependable repeatable land clear for teams that want endgame progression without waiting for an offshore event. The route is compact enough to plan, valuable enough to fight over, and important enough in the fragment economy to remain hot throughout a wipe.
Why it is not higher: The monument punishes sloppy pacing. Choke points amplify third parties, the PvE tax can drain a weak kit, and extraction is never free. It dominates when a team clears methodically and leaves on time; it becomes a trap when greed extends the run.
A Tier: High-Risk, High-Reward Staples
A-tier monuments are the best route anchors for most serious players. Each has S-tier moments, but transport, map variance, environmental overhead, event timing, or team-size dependence keeps it one step below the universal top tier.
Small Oil Rig
Best for: Experienced solos and duos
Small Oil Rig is the best high-tier offshore target for an experienced solo or duo. It is easier to read and control than Large Oil, still connects directly to advanced progression, and offers a realistic way for a small team to punch above its weight.
Why it is not higher: It stays in A rather than S overall because the peak reward and group scaling are lower, while the transport and counter risks remain severe. For a confident solo, Small Oil can feel S tier; for the average server population, A is the fairer verdict.
Underwater Labs
Best for: Solos and small groups
Underwater Labs is the strongest specialist pick for solos. It offers advanced progression, lower surface visibility, and a layout advantage for players who learn the generated route early. Multiple possible approaches also make it easier to decline a bad fight than at many fixed land monuments.
Why it is not higher: Map generation is the catch. Lab size, access, and usefulness vary by seed, and the monument asks for water mobility before it pays off. A good lab is S tier for a solo; an awkward or heavily watched lab can fall to B.
Water Treatment Plant
Best for: Every team size
Water Treatment Plant is the most balanced large land monument. It has enough room to scout, enough cover to break contact, and enough progression value to anchor a wipe route without forcing every run into an all-or-nothing event.
Why it is not higher: Water lacks the singular endgame spike that defines S tier. Its strength is consistency rather than a jackpot. That makes it one of the safest recommendations in the article – and often the correct place to live near – even when it is not the absolute top reward.
Train Yard
Best for: Duos, groups, and mobile solos
Train Yard remains an A-tier staple because it combines strong progression with vertical cover, multiple route choices, and useful rail access. It rewards teams that know when to hold height and when to use the broader network to disengage.
Why it is not higher: The transitions are exposed and the central location invites third parties. Train Yard is excellent when you control tempo, but a slow clear lets nearby teams collapse from several directions. It is an anchor, not a casual detour.
Giant Excavator Pit
Best for: Organized groups and clans
Giant Excavator Pit converts coordination into a server-level resource lead better than almost any other location. A clan that can supply, defend, and transport from Excavator can turn one controlled window into days of building and raiding momentum.
Why it is not higher: The overall rank drops to A because solo and duo value is much lower. Excavator is not a universal monument run; it is an industrial objective. The more your team can coordinate territory and logistics, the closer it moves to S.
Arctic Research Base
Best for: Prepared duos and groups
Arctic Research Base is an A-tier specialist: compact, valuable, and often isolated enough to reward teams that deliberately choose the snow. Its fights are readable, and the monument can support a fast snowball when nearby teams underestimate how quickly it can be revisited.
Why it is not higher: Environmental overhead and geared snow neighbors keep it from universal S tier. Solos can make it work, but the clear takes commitment and a bad counter is difficult to reset. Build near it because you chose the snow – not because an online tier list said A.
Ghost Ships
Best for: Boat-ready groups
Ghost Ships debut in A tier. They deliver the high-risk, high-reward fights promised by the Deep Sea update, and their combination of ship combat, scientist pressure, and player counters gives them a legitimate endgame ceiling.
Why it is not higher: They are not S tier because access is intermittent and the March 2026 balance pass reduced the initial Deep Sea payout, delayed its opening, randomized its side of the map, and increased the transport commitment. Ghost Ships are excellent when your team is already sea-ready; they are a poor reason to rebuild your whole wipe plan.
Gearing up to run S-tier monuments?
Skip the grind – buy the Rust weapons and gear you actually want on Tradeit.
B Tier: Mid-Game Workhorses
B tier is where efficient players often make the most consistent progress. These monuments do not dominate the server, but they reward proximity, repetition, and playstyle fit. For a solo, several B-tier options outperform the overall S tier.
Sewer Branch
Best for: Solos and duos
Sewer Branch is the definition of a B-tier workhorse: compact, predictable, and easy to fold into an early or mid-wipe loop. A solo can scout it quickly, commit without crossing an enormous footprint, and leave before the whole grid rotates in.
Why it is not higher: It does not scale into a late-wipe jackpot. Once a team can reliably contest A- and S-tier targets, Sewer becomes a supporting stop rather than the destination. That is exactly what B tier is for.
Power Plant
Best for: Solos who value exits; groups
Power Plant is one of the most underrated picks in Rust. Its size creates several ways to disengage, and it often receives less automatic attention than Water Treatment or Train Yard despite supporting a strong mid-wipe route.
Why it is not higher: The sprawling footprint is also a time tax. Players who do not know the layout turn a safe escape option into a long exposed walk. Power is B by default and can become A when it is close to base and quieter than the headline monuments.
Airfield
Best for: Groups; confident solos
Airfield offers enough volume and map relevance to stay in B, but it is one of the most server-dependent monuments in the list. On a quiet route it feels efficient; on a crowded wipe it becomes a sequence of open-field checks and hangar third parties.
Why it is not higher: The exposure is why it does not join Water Treatment in A. Airfield rewards information and numbers more than clever extraction. A solo can run it, but should treat the surrounding sightlines as the real monument.
The Dome
Best for: Solos and duos
Dome moved up after the progression overhaul gave it a genuine role in the fragment loop. It remains fast to scout, easy to understand, and attractive to solos who want a monument they can evaluate before fully committing.
Why it is not higher: Its vertical route is predictable and the highest-value path is often stripped before you arrive. Dome is now too useful for C tier, but too easy to pre-clear or watch from range for A.
Ferry Terminal
Best for: Solos and mobile duos
Ferry Terminal is one of the clearest winners of the new monument meta. It now supports meaningful early progression while connecting coast, road, and underground travel, which makes it especially valuable to a solo trying to avoid one-grid living.
Why it is not higher: Its ceiling still stops below the major land monuments. Ferry dominates as part of a route – not as the final destination. When it sits beside good roads and a useful tunnel branch, it can perform like A tier.
Radtown
Best for: Solos and early groups
Radtown earns B after its return, loot refresh, and new progression role. Dense cover and a compact footprint favor players who learn the angles, while the monument now matters beyond a quick roadside stop.
Why it is not higher: Fresh-wipe traffic can be relentless and the reward still does not justify a late-wipe detour for geared teams. Radtown is a strong solo home-base anchor, not an endgame objective.
Abandoned Military Base
Also known as: Desert Military BaseBest for: Solos and duos
Abandoned Military Base – often called Desert Military Base – deserves B as a fast, compact solo route. It is easy to understand, usually offers useful cover, and has enough progression weight to support a player who deliberately bases in the desert.
Why it is not higher: Its isolation can be either safety or a trap, and snowballing desert groups often claim the surrounding roads. It lacks the all-wipe flexibility of Water Treatment, but it is much stronger than the old article’s shared C-tier treatment suggested.
Underground Rail Network
Also known as: Train TunnelsBest for: Solos and duos
The Underground Rail Network belongs in B, not F. It offers repeatable underground progression, long-distance movement, and a way for small teams to build value without standing in the most visible surface arenas.
Why it is not higher: The commitment is real: gunfire can reveal activity, stations and exits can be camped, and a long run magnifies every inventory loss. It is not a single clean monument loop, but for the right solo it is one of the best supporting systems on the map.
Harbors
Also known as: Large Harbor and Small HarborBest for: Solos, duos, and boat teams
Large and Small Harbor share B tier because both are valuable as coastal connectors. They fit naturally into road, ocean, Cargo, and base-return routes, and their cluttered layouts give smaller teams more ways to hide or disengage than open inland monuments.
Why it is not higher: Neither variant has an A-tier ceiling on its own. Their value comes from adjacency and route design. A harbor beside Cargo’s path or a strong road can be excellent; an isolated harbor can feel like C.
Tropical Islands
Best for: Sea-ready solos and groups
Tropical Islands rank in B as supporting Deep Sea objectives. They add meaningful opportunities while the offshore region is open and can reward teams that explore beyond the obvious Ghost Ship fight.
Why it is not higher: They are not dependable enough to anchor a wipe plan. The Deep Sea opens intermittently, the initial payout was reduced in March 2026, and the voyage itself creates opportunity cost. Treat the islands as profitable additions to a sea route, not the route’s sole purpose.
C Tier: Early Scrap Farms
C-tier monuments are early-wipe and transitional farms. They are good when they lie on your road, coast, or spawn route; they become inefficient the moment you cross the map specifically for them.
Satellite Dish
Best for: Beginners and early solos
Satellite Dish remains a clean early-wipe transition monument. Its compact footprint makes it easy to understand, and it can bridge a primitive route into the next stage without requiring a long clear.
Why it is not higher: Dome, Ferry Terminal, and Radtown all gained stronger reasons to visit after the progression changes. Satellite did not become bad; the competition around it simply improved. That leaves it in C.
Junkyard
Best for: Solos who know the layout
Junkyard is worth checking when it lies on your road or industrial route. Its messy cover can protect a solo, and its broader economic role can support players who know exactly what they came to do.
Why it is not higher: The same clutter slows looting and makes information unreliable. Junkyard rarely justifies crossing the map, so C is the correct default even though a quiet local Junkyard can be very profitable.
Oxum’s Gas Station
Best for: Beginners and solos
Oxum’s is useful because it is fast, recognizable, and easy to fold into a spawn-side route. It can stabilize a weak start without asking for the commitment of a true puzzle monument.
Why it is not higher: The tiny footprint is easy to camp and the progression ceiling is low. Visit when it is on the way; do not build an entire wipe around it.
Abandoned Supermarket
Best for: Beginners and fresh spawns
Supermarket is a dependable beginner stop for food, basic progression, and a quick decision about whether the surrounding area is playable. It is one of the easiest monuments to read without a guide.
Why it is not higher: Fresh-spawn traffic and grub pressure make the small building more dangerous than its reward suggests. It is a good first link in a route and a weak final destination.
Mining Outpost
Best for: Solos on high-pop servers
Mining Outpost offers a short, readable stop that can keep a solo moving on a crowded server. The low time commitment is its best feature: you can check it, take the value, and disappear before a larger team rotates.
Why it is not higher: It does not create meaningful mid- or late-wipe progression on its own. Mining Outpost is C because it is efficient at a small job, not because the job is especially valuable.
Lighthouse
Best for: Coastal solos
Lighthouse is a useful coastal stop when it links a spawn route, boat route, or nearby base. Its vertical form provides information and can occasionally make defense easier than at a flat roadside monument.
Why it is not higher: The approaches are predictable and the reward does not scale. Once the server is geared, the tower becomes more of a sightline problem than a progression target.
Jungle Ziggurat
Best for: Jungle starts and primitive play
Jungle Ziggurat is the better of the jungle remnants for progression. It gives a fresh player a recognizable destination inside a biome where foliage can otherwise make routes feel directionless.
Why it is not higher: The ceiling is intentionally early-game, and jungle visibility plus wildlife can turn a simple stop into a messy loss. It is a useful C-tier anchor, not a monument worth revisiting after your route matures.
D Tier: Bare Minimum
D-tier locations solve narrow problems. They can be valuable inside a deliberate industrial or fresh-spawn plan, but they are weak general recommendations for gear and wipe progression.
Quarries
Also known as: Stone, Sulfur, and HQM QuarryBest for: Clans with a diesel plan
The three mining quarries are industrial objectives rather than general monument runs. A clan with fuel, transport, and perimeter control can rate the right quarry far above D because the output supports a specific building or raiding plan.
Why it is not higher: For the average player comparing monuments for gear and wipe progression, the opportunity cost is too high. Quarries are destinations only when the resource plan comes first; otherwise they are landmarks to pass.
Jungle Ruins
Best for: Fresh spawns already passing through
Jungle Ruins were designed as small atmospheric stops with early-game supplies, and that is exactly how they should be used. They can improve a route at almost no extra cost when you are already in the jungle.
Why it is not higher: They do not justify a detour, repeated contest, or base-location decision. D tier does not mean useless; it means the monument should serve the route rather than define it.
F Tier: Traps and Skips
F tier does not mean the location has zero utility. It means the monument is one of the worst places to detour for progression. Use it when the immediate survival benefit is obvious; otherwise, skip it.
Abandoned Cabins
Best for: Only when directly on your path
Abandoned Cabins remains one of the worst deliberate monument destinations. It can provide situational early utility, but the reward, route depth, and revisit value are too low to compete with nearby roadside or B-tier solo options.
Why it is not higher: Use it as a pass-through, not a plan. Crossing a grid specifically for Cabins is usually the wrong call unless every stronger option is controlled and the detour is effectively free.
Water Wells
Best for: Water and shelter emergencies
Water Wells are utility landmarks, not progression monuments. Their variants can solve a local survival problem or give a brief point of orientation, but they do not create a repeatable route that advances a wipe.
Why it is not higher: That makes Water Wells the clearest F-tier answer in the article. Stop when you need the utility; skip them when deciding where to farm, fight, or base for monument access.
Safe Zones (Not Tiered – Utility Only)
Safe zones and utility hubs answer a different question from this ranking. They help players shop, travel, trade, rent, gamble, buy transport, or stabilize a base route; they are not contested progression farms and should not be called S or F based on loot.
Excellent for shopping, trading, transport links, and base-adjacent utility. Judge it by convenience and map position, not by a loot run.
A utility destination for vendors, gambling, transport, and player traffic. Valuable, but strategically different from a monument clear.
A new early-wipe housing and marketplace monument. Rentable rooms and player shops make it a settlement choice; burglary risk makes location and neighbors more important than a tier score.
Boat access, missions, supplies, and sea-route support. They can enable Oil Rig, Underwater Labs, and Deep Sea play without being ranked against those objectives.
Horse access and travel utility. The old article incorrectly placed Ranch in F; stables belong in the unranked utility group.
The four 2026 variants provide offshore vendors and safe-zone services while the Deep Sea is active. They support a sea expedition rather than compete with Ghost Ships for tier placement.
How to Adapt This Tier List to Your Playstyle
The overall list assumes that every team size matters. Your personal list should not. Solos should reward escape routes, information, and repeatability; groups can absorb longer clears; clans should value industrial control and server-wide objectives. Apply the following overrides before choosing a base location.
Solo priorities
- Underwater Labs: best specialist pick when the generated layout is good
- Small Oil Rig: A overall, but S for an experienced solo with transport
- Ferry Terminal: route density, coast access, and tunnel connectivity
- Radtown / Dome: fast, readable fragment stops
- Sewer / Power: repeatable land loops with manageable exits
Small-group priorities
- Small Oil / Water: best balance of ceiling and recoverability
- Train Yard: strong when the group can control vertical transitions
- Nuclear Silo: S-tier output with disciplined entry and exit timing
- Arctic Base: excellent for groups that deliberately choose the snow
- Ghost Ships: worth the voyage when the group is already boat-ready
Clan priorities
- Large Oil / Cargo: highest event ceiling and server pressure
- Launch / Military Tunnels: repeatable land endgame routes
- Giant Excavator: can become S tier inside a resource-control plan
- Nuclear Silo: condensed top-end progression
- Water / Train Yard: stable secondary territory around the main objectives
Find the best monuments for your wipe
Choose your team size, wipe phase, risk tolerance, and preferred route. The tool ranks a practical top three from this article; it does not calculate exact loot or mechanics.
1. Underwater Labs
Strong solo specialist with layout knowledge, multiple approaches, and advanced progression.
2. Water Treatment Plant
The safest all-round recommendation: flexible, consistent, and useful for every team size.
3. The Dome
Fast, scoutable fragment stop that rose in the new progression meta.
Solo Players
Solos should move Underwater Labs, Small Oil Rig, Ferry Terminal, Radtown, Dome, Sewer Branch, Power Plant, and the Underground Rail Network up by roughly one personal tier. These locations reward scouting, route memory, and the ability to leave before a larger team finishes rotating.
Move Giant Excavator, Large Oil Rig, Cargo Ship, Arctic Research Base, and Airfield down unless you have a specific plan. Their overall tier reflects value that a solo may not be able to secure or extract consistently. Large Oil is still possible solo, but the 2026 patrol-boat pressure makes the approach less forgiving than it was.
Solo rule: information beats theoretical loot. A monument you can scout from base, reach quickly, and abandon safely will outperform a higher tier that forces blind travel.
Groups and Clans
Duos and trios get the broadest A-tier pool. Small Oil, Water Treatment, Train Yard, Nuclear Silo, Arctic Research Base, and Ghost Ships all reward a team large enough to cover angles without creating the logistical drag of a clan.
Clans should push Giant Excavator into personal S tier and prioritize Large Oil, Cargo, Launch Site, Military Tunnels, and Nuclear Silo. Those targets convert coordination into territory, advanced progression, and resource control. The tradeoff is visibility: the server will know what your team is doing, and rivals can plan around it.
Clan rule: rank the surrounding territory, not just the monument. A top-tier objective with poor build space, bad roads, or no secondary route can be worse than a connected A-tier cluster.
Early Wipe vs Late Wipe
Early wipe favors short, repeatable loops: Supermarket, Oxum’s, Mining Outpost, Sewer Branch, Dome, Ferry Terminal, Radtown, Satellite Dish, Jungle Ziggurat, and Abandoned Military Base. The goal is not to “finish” one monument; it is to connect several stops while the map is crowded and your recovery kit is weak. For timing context, keep the Rust force wipe schedule open before choosing a server or planning a first-day route.
Mid wipe is where Water Treatment, Train Yard, Power Plant, Small Oil, Underwater Labs, Arctic Research Base, and Nuclear Silo become the best territory anchors. Late wipe shifts attention toward S-tier events, Giant Excavator, Ghost Ships, and fights where one win can fund the next raid or defend the base.
Wipe-phase rule: lower-tier monuments do not become useless late. They become recovery routes. A quiet C-tier loop can rebuild the kit that lets you contest S tier again.
2026 Meta Shifts: What Moved and Why
The old ranking was not merely missing new monuments; several verdicts were based on a pre-fragment progression model. The October 2025 Meta Shift made medium and large monuments central to workbench progression, the November reset changes reduced stalled puzzle cycles, and 2026 added Deep Sea objectives plus the Apartment Complex. These are the movements that matter now.
The biggest structural change is reliability. Monument refresh timers now continue while players are nearby after a qualifying loot interaction, with a reset phase that forces campers away from the relevant puzzle area. That does not make monuments safe, but it makes a contested route less likely to remain empty indefinitely simply because players are fighting around it.
The biggest new-content correction is Deep Sea restraint. Ghost Ships deserve A for ceiling, while Tropical Islands settle in B and Floating Cities remain unranked utility. The March reductions prevent the entire offshore region from automatically becoming S tier just because it is new.
The newest July correction is Apartment Complex. It is a housing, marketplace, and social-risk system aimed at getting players started. Rank it by whether the location, rent, neighbors, and burglary risk fit your wipe – not by how many progression runs it replaces.
Want the Full Monument Reference? (See Our Guide)
This page owns the ranking verdict: which monuments are best, which are worst, what dominates for solos or clans, and what changed in the 2026 meta. It intentionally stops before reference mechanics.
Use the full Rust monuments guide for exact reference details
Open Tradeit’s Rust monuments guide (full reference) when you need the current monument roster, where a monument can appear, exact keycard routes, puzzle steps, radiation requirements, recycler placement, or loot-reference information.
- This tier list: best, worst, solo, clan, wipe phase, meta shifts.
- The guide: locations, routes, mechanics, requirements, reference tables.
Ready to trade Rust skins?
Buy, sell, or trade Rust skins instantly on Tradeit – no Steam Wallet lock-in.
FAQ
Rust monument ranking answers
Which Rust monument has the best loot in 2026?
Large Oil Rig is the best overall monument in 2026 because it combines the highest wipe-changing ceiling with repeatable server-wide relevance. Cargo Ship can create the fastest event snowball, while Launch Site and Nuclear Missile Silo are the strongest fixed land alternatives. The best practical choice is still the highest-ranked monument your team can reach and extract from consistently.
What monuments are best for solo players?
Underwater Labs is the best solo specialist when the generated layout and access are good. Small Oil Rig can be S tier for an experienced solo, while Ferry Terminal, Radtown, Dome, Sewer Branch, Power Plant, Abandoned Military Base, and the Underground Rail Network offer more repeatable routes with lower commitment. Solos should rank exits and travel time above theoretical maximum reward.
Which monuments should beginners prioritize on an early wipe?
Beginners should connect short stops rather than force one difficult clear. Supermarket, Oxum’s Gas Station, Mining Outpost, Satellite Dish, Sewer Branch, Dome, Ferry Terminal, Radtown, Jungle Ziggurat, and Abandoned Military Base are sensible early-route targets. Choose two or three that sit close together and avoid crossing the map for a single C-tier stop.
Are Oil Rig runs worth it without a team?
Small Oil Rig can be worth it for an experienced solo because the route is more controllable than Large Oil and still supports endgame progression. Large Oil is possible solo, but its 2026 patrol boats, longer commitment, and counter pressure make it a high-variance choice. For most solos, a repeatable Labs, Ferry, Radtown, Dome, Sewer, or Power route will progress the wipe more consistently.
What is the worst Rust monument to visit?
Water Wells are the worst deliberate progression detour because they solve local survival needs without creating a meaningful repeatable wipe route. Abandoned Cabins is the weakest named progression destination. Neither is literally useless; F tier means you should stop only when the immediate utility is obvious and the detour is nearly free.
How often should I run monuments for the best wipe progression?
Build a loop of two or three nearby monuments and revisit them as they reset rather than camping one location. Early wipe, favor quick C- and B-tier stops that let you recover cheaply. Mid and late wipe, rotate into A and S tier when your kit, transport, and team size support extraction. Consistency beats one spectacular run followed by repeated full-kit losses.
Which monument moved the most in tier for 2026?
Nuclear Missile Silo moved the most. The October 2025 repositioning turned it into a red-keycard endgame monument with advanced Blueprint Fragment access, and that change defines its S-tier role throughout 2026. Dome, Ferry Terminal, and Radtown also rose after gaining a stronger place in the fragment-driven monument loop.