The autoexec config file offers a world of possibilities for personalizing your Counter-Strike 2 game settings and optimizing performance. In this guide, you will discover the role and benefits of autoexec files, how to create your own, and essential CS2 autoexec commands to tailor your game settings.
- Autoexec files store your personalized settings and automatically apply them every time you launch CS2
- Creating an autoexec is simple: write commands in a text file, save as autoexec.cfg, and place it in the correct folder
- Use launch options to ensure your autoexec loads properly every time
- Customize grenade binds, crosshair, viewmodel, and radar settings for a competitive edge
- Pro players use autoexec files to maintain consistent settings across different setups
Creating an Autoexec File in CS2
When I first started playing Counter-Strike seriously, I quickly realized that constantly adjusting my settings between sessions was a massive waste of time. That’s when I discovered the magic of autoexec files—configuration files that automatically execute your preferred settings every time you launch the game.
Think of your autoexec file as a personal assistant that sets up your perfect gaming environment without you lifting a finger. It ensures your settings are consistent across different computers and even after game updates that might reset your configurations.
Your autoexec file can store virtually any console command in CS2. The most popular settings include:
- Grenade Binds: Quick-access keys for flashes, smokes, and molotovs
- Crosshair Settings: Size, color, gap, and style of your aiming reticle
- ViewModel Settings: How your weapons appear on screen
- Radar Settings: Scale, zoom, and display options for the minimap
- Network Settings: Rates and interpolation for optimal netcode
- Performance Commands: FPS optimization and visual settings
- Custom Binds: Jump-throw, quick-switch, and utility macros
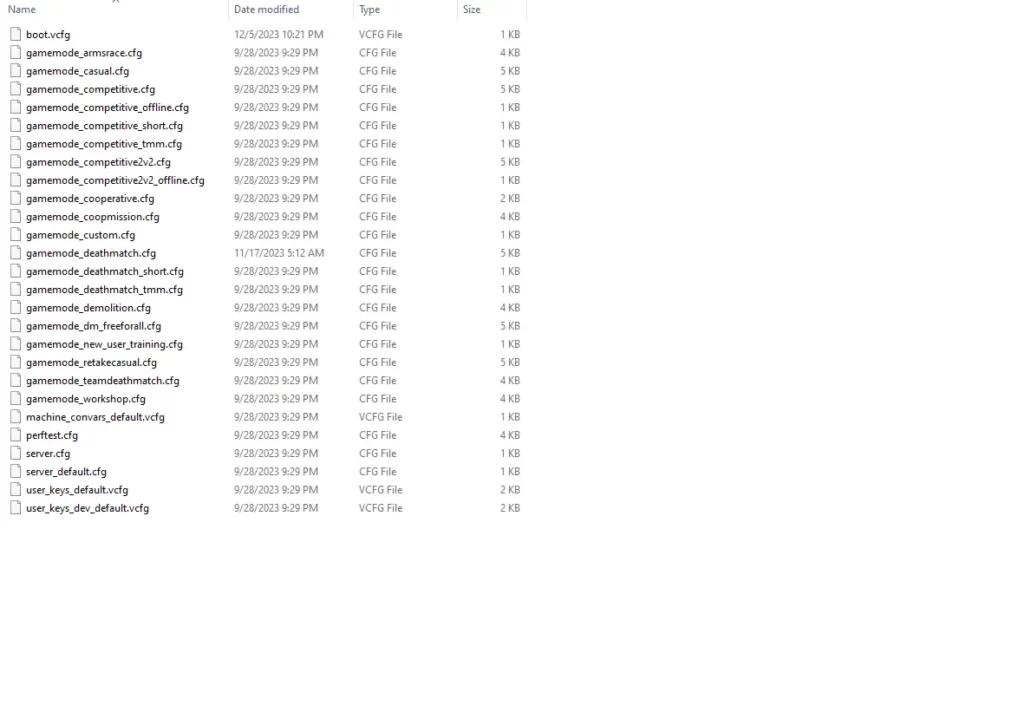
Creating your own autoexec file is surprisingly straightforward. While browsing through CS2 skins on Tradeit, I often remind myself how my autoexec helps me show them off effectively in-game with optimal viewmodel settings.
Steam\steamapps\common\Counter-Strike Global Offensive\game\csgo\cfg
• Inconsistent settings
• Manual adjustments every game
• Settings reset after updates
• Different experience on different PCs
• Consistent experience
• Automatic setup
• Settings survive updates
• Same settings everywhere you play
Making Sure Your Autoexec Always Loads
After creating your perfect autoexec file, the last thing you want is for the game to ignore it. I’ve experienced this frustration myself—setting up the perfect config only to launch CS2 and find none of my settings applied. The solution? Properly configuring your launch options.
Launch options are special commands that tell Steam how to start your game. By adding the correct launch option, you can force CS2 to execute your autoexec file every time it starts up. As someone who’s tested various expensive CS2 knives with different viewmodel settings, I can’t stress enough how important consistent config loading is.
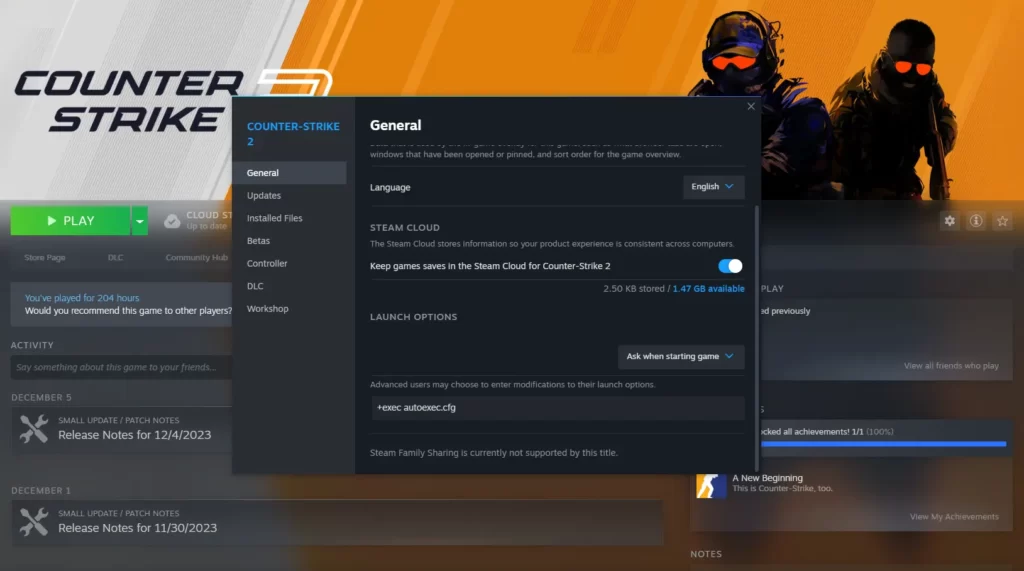
- Right‑click on CS2 in your Steam library and select “Properties”
- Open the Launch Options field on the General tab
- Type +exec autoexec.cfg in the field
- Click “OK” to save your settings
- Launch CS2 and verify your settings are applied
If your autoexec isn’t loading correctly, try these solutions:
- Add host_writeconfig as the last line in your autoexec
- Check for any typos in your config file and launch options
- Verify the file is saved as
.cfg(not.txtor.cfg.txt) - Execute it manually via console with exec autoexec
- Make sure you have appropriate file permissions
Power‑user tips for autoexec management:
- Create multiple config files for different situations (practice, competitive, casual)
- Use cloud storage to sync your config across devices
- Add echo “Autoexec loaded successfully!” to confirm loading
- Create an alias command to reload your config quickly during gameplay
- Comment your config with // to remember what each setting does
Pro Tip: Test Your Configuration
Always add echo “Autoexec Loaded Successfully!” near the end of your autoexec file. When you launch CS2, open the console (~) to check if this message appears. If it does, your autoexec is loading correctly!
For extra reliability, I always add host_writeconfig as the final line in my autoexec file. This command forces the game to save all your settings to the config file, preventing any settings from being overwritten when you exit the game.
Essential Autoexec Commands for Competitive Edge
Now comes the fun part—filling your autoexec with commands that will elevate your gameplay. After years of experimenting with different settings, I’ve compiled my must-have commands that give you a genuine advantage in competitive matches.
Whether you prefer wielding a top-tier CS2 knife or focusing on utility usage, these settings will help you perform at your best.
Let’s break down the most impactful command categories to include in your autoexec file.
Grenade Binds
Nothing has improved my utility usage more than having dedicated keys for each grenade. In those crucial clutch moments, fumbling through your inventory with the number keys can cost you precious seconds—and often the round.
With these grenade binds, you’ll have instant access to each utility type with a single keypress, allowing for faster executes and more responsive defensive plays.
| Command | Function | Personal Notes |
|---|---|---|
| bind “f” “use weapon_flashbang” | Instantly equips flashbang | I use F instead of capslock for easier reach during movement |
| bind “c” “use weapon_smokegrenade” | Instantly equips smoke grenade | C for Cloud—helps me remember this binding |
| bind “x” “use weapon_hegrenade” | Instantly equips HE grenade | X is perfect as it’s near your movement keys |
| bind “z” “use weapon_molotov; use weapon_incgrenade” | Equips either molotov or incendiary | I use Z instead of alt to avoid conflicts with voice comms |
| bind “v” “use weapon_decoy” | Instantly equips decoy grenade | Optional but useful for fake executes |
| bind “4” “slot4” | Standard cycle through all grenades | Keeps the default option available as backup |
These grenade binds have completely transformed my utility usage.
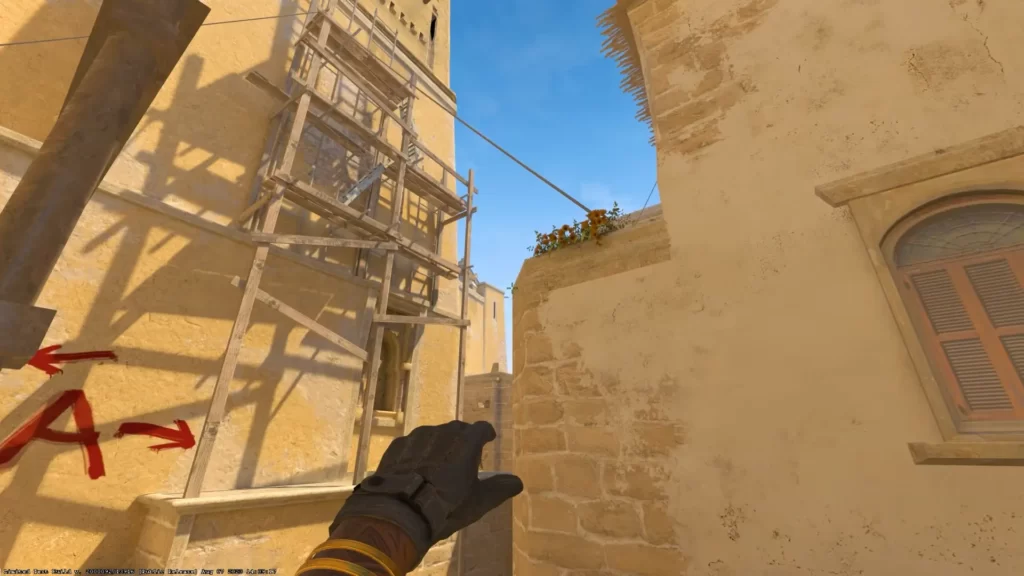
During a recent match on Mirage, I needed to quickly molotov Jungle while flashing A ramp—the instant access to both grenades let me execute this complex play in seconds, securing us the round.
While these binds won’t make your budget CS2 knife any flashier, they’ll definitely make your utility usage more impressive.
Advanced Grenade Script: Jump-Throw Bind
For perfectly consistent smoke throws, a jump-throw bind is essential. This script allows you to release a grenade at the exact same point in your jump every time, making complex smoke lineups much more reliable.
alias “-jumpthrow” “-jump”
bind “n” “+jumpthrow”
To use this bind: Hold your left mouse button to prepare the throw, then press N to perform a perfect jump throw. This works wonders for those pixel-perfect Mirage window smokes or Nuke yard smokes that require precise timing.
Crosshair Settings
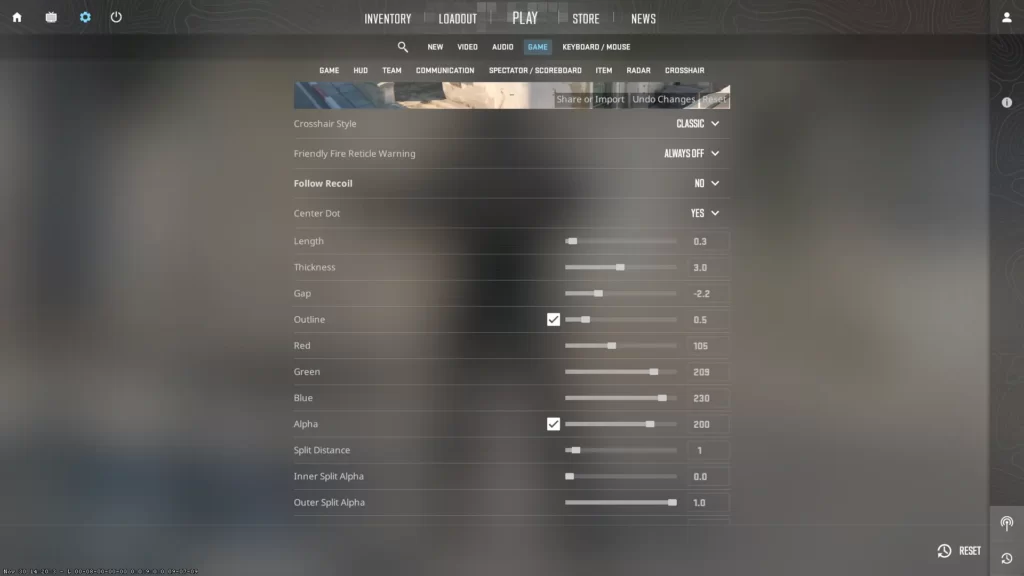
Your crosshair is arguably the most personal aspect of your CS2 setup.
After experimenting with countless variations, I’ve found that simpler crosshairs typically offer better precision without cluttering your screen.
Your crosshair is the centerpiece of your aiming experience. The perfect crosshair should be visible against all backgrounds while remaining unobtrusive. These commands will help you craft your ideal aiming reticle.
My personal preference is a small, static crosshair with a center dot—providing both precision for headshots and visibility during fast movements.
// My Pro-Style Cyan Crosshair Setup
cl_crosshairstyle "4"
cl_crosshairsize "2.5"
cl_crosshairthickness "0.5"
cl_crosshairgap "-1"
cl_crosshairdot "1"
cl_crosshaircolor "4"
cl_crosshairalpha "255"
cl_crosshair_t "0"
cl_crosshair_drawoutline "1"
cl_crosshair_outlinethickness "1"
My journey to find the perfect crosshair took dozens of matches—I’ve tried everything from tiny dots to large spreads. I eventually settled on a small cyan crosshair with a center dot that provides excellent visibility against both dark and light map areas.
When testing against bots on Aim Botz, my headshot percentage improved noticeably after fine-tuning these settings.
When buying new affordable CS2 skins, I always make sure my crosshair complements them visually while keeping functionality as the priority.
ViewModel Settings
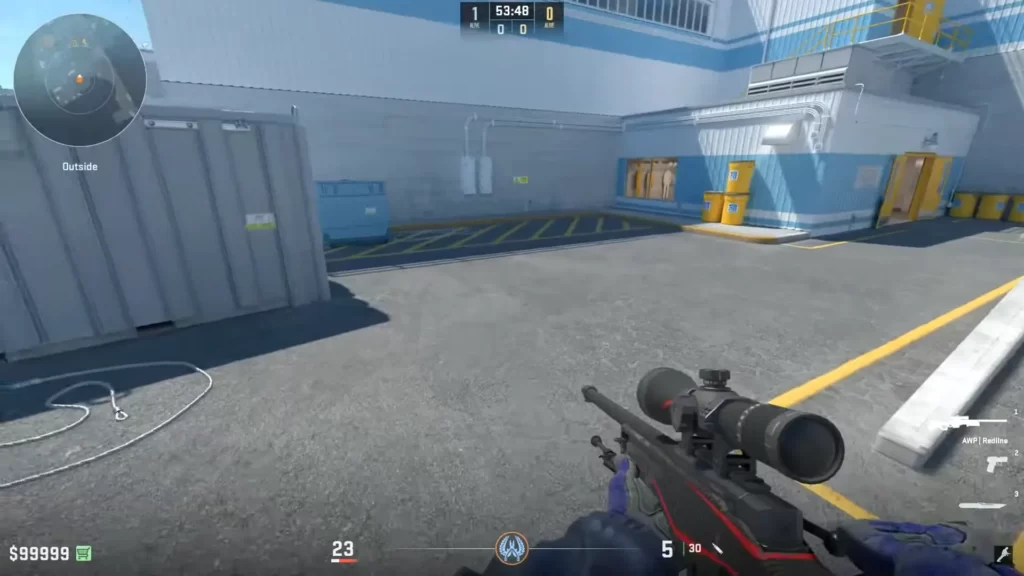
Your viewmodel settings determine how much screen space your weapon occupies. While showcasing a beautiful high-end CS2 knife is tempting, competitive players know that minimizing visual obstructions is crucial for spotting enemies and maintaining awareness of your surroundings.
Your weapon model can take up a significant portion of your screen real estate. The right viewmodel settings pull your weapon closer to the edge of the screen, giving you a wider field of view to spot enemies and track movements.
I’ve found that a slightly pulled-back viewmodel offers the best balance between visibility and aesthetic appeal, especially when using fancy weapon skins or knives.
| Command | Function | Optimal Values |
|---|---|---|
| viewmodel_fov | Sets field of view for weapon model | 68 (maximum value) for widest view |
| viewmodel_offset_x | Horizontal position of weapon | 2 to 2.5 (moves weapon right) |
| viewmodel_offset_y | Forward/backward position | -2 to 0 (pulls weapon back) |
| viewmodel_offset_z | Vertical position of weapon | -1.5 to -2 (lowers weapon) |
| cl_righthand | Switches weapon between left/right | 1 for right-hand, 0 for left-hand |
| cl_bobamt_lat | Reduces sideways weapon movement | 0.1 to 0.4 (lower = less movement) |
| cl_bobamt_vert | Reduces vertical weapon bouncing | 0.1 to 0.25 (lower = less bounce) |
| cl_viewmodel_shift_left_amt | Reduces weapon movement when strafing | 0.5 to 1.0 (lower = more stable) |
After tweaking my viewmodel settings, I noticed an immediate improvement in my ability to spot enemies at the edges of my screen. During a clutch situation on Dust2, I was able to notice movement at the corner of B site that I would have missed with the default settings. These small advantages add up to make a significant difference in your overall performance.
Radar Enhancement
The radar might be the most underrated tool in CS2. A properly configured radar provides crucial information about enemy positions, teammate movements, and overall map control.
I’ve found that customizing these settings gives me a significant information advantage, especially when coordinating with teammates who might be using CS2 skins they’ve traded as position callouts.
A well-configured radar is like having a sixth sense for map awareness. The default radar settings in CS2 don’t provide optimal information at a glance. These commands transform your radar into a powerful tactical tool.
My setup focuses on maximizing the visible area while keeping player icons at a size that’s easy to distinguish quickly during intense gameplay.
| Command | Function | Recommended Setting |
|---|---|---|
| cl_radar_scale | Sets the zoom level of radar | 0.3-0.4 (shows more of the map) |
| cl_radar_always_centered | Centers radar on player position | 0 (off – shows more useful map area) |
| cl_radar_icon_scale_min | Sets minimum size of icons on radar | 0.6-0.7 (clearly visible without overlapping) |
| cl_hud_radar_scale | Adjusts overall radar size in HUD | 1.0-1.15 (larger for better visibility) |
| cl_radar_rotate | Toggles radar rotation with player | 1 (on) for most players, 0 for fixed north |
| cl_teammate_colors_show | Shows unique colors for teammates | 1 (always show colors) or 2 (show letters too) |
| cl_hud_bomb_under_radar | Places bomb icon under radar | 1 (on) for cleaner HUD layout |
// My Optimized Radar Configuration
cl_radar_scale "0.35"
cl_radar_always_centered "0"
cl_radar_icon_scale_min "0.7"
cl_hud_radar_scale "1.15"
cl_radar_rotate "1"
cl_teammate_colors_show "2"
cl_hud_bomb_under_radar "1"
cl_hud_playercount_pos "0"
cl_hud_playercount_showcount "1"
My optimized radar has saved countless rounds. In a crucial 1v2 situation on Overpass, I was able to spot an enemy flanking from connector on my radar before they were visible—information that led to a successful clutch.
These small advantages accumulate over time, improving your win rate significantly.
Performance & Network Commands
Beyond cosmetic and tactical settings, your autoexec can also enhance your game’s performance. When browsing the CS2 skin marketplace, I’m always conscious that even the most beautiful skin won’t help if your game isn’t running smoothly. These commands focus on optimizing network settings and framerate stability.
These commands focus on network settings and performance optimizations that can give you a more responsive and stable gameplay experience, particularly important during competitive matches.
My Complete Autoexec Configuration
I’ve developed an autoexec file that perfectly balances performance, visibility, and tactical advantage.
Here’s something that you can use as a starting point for your own configuration:
// ===========================
// MY CS2 AUTOEXEC CONFIGURATION
// ===========================

// MOUSE SETTINGS
sensitivity "1.2"
zoom_sensitivity_ratio_mouse "0.8"
m_rawinput "1"
m_customaccel "0"

// CROSSHAIR SETTINGS
cl_crosshairstyle "4"
cl_crosshairsize "2.5"
cl_crosshairthickness "0.5"
cl_crosshairgap "-1"
cl_crosshairdot "1"
cl_crosshaircolor "5"
cl_crosshaircolor_r "0"
cl_crosshaircolor_g "255"
cl_crosshaircolor_b "255"
cl_crosshairalpha "255"

// VIEWMODEL SETTINGS
viewmodel_fov "68"
viewmodel_offset_x "2.5"
viewmodel_offset_y "-2"
viewmodel_offset_z "-1.5"
cl_righthand "1"
cl_bobamt_lat "0.1"
cl_bobamt_vert "0.1"
cl_viewmodel_shift_left_amt "0.5"
cl_viewmodel_shift_right_amt "0.5"

// RADAR SETTINGS
cl_radar_scale "0.35"
cl_radar_always_centered "0"
cl_radar_icon_scale_min "0.7"
cl_hud_radar_scale "1.15"
cl_radar_rotate "1"
cl_teammate_colors_show "2"
cl_hud_bomb_under_radar "1"

// GRENADE BINDS
bind "f" "use weapon_flashbang"
bind "c" "use weapon_smokegrenade"
bind "x" "use weapon_hegrenade"
bind "z" "use weapon_molotov; use weapon_incgrenade"
bind "v" "use weapon_decoy"

// BUY BINDS
bind "kp_home" "buy ak47; buy m4a1;"
bind "kp_uparrow" "buy awp;"
bind "kp_pgup" "buy vesthelm;"
bind "kp_leftarrow" "buy flashbang;"
bind "kp_5" "buy smokegrenade;"
bind "kp_rightarrow" "buy hegrenade;"
bind "kp_end" "buy molotov; buy incgrenade;"
bind "kp_downarrow" "buy defuser;"
bind "kp_pgdn" "buy vest;"

// NETWORK SETTINGS
rate "786432"
cl_interp "0.031"
cl_interp_ratio "2"
cl_updaterate "128"
cl_cmdrate "128"
fps_max "0"

// HUD SETTINGS
cl_hud_playercount_pos "0"
cl_hud_color "1"
cl_hud_healthammo_style "1"
net_graph "1"
net_graphproportionalfont "0"

// SOUND SETTINGS
volume "0.5"
voice_scale "0.7"
snd_mixahead "0.025"
snd_headphone_pan_exponent "2"
snd_front_headphone_position "45"
snd_rear_headphone_position "135"

// PRACTICE SETTINGS (comment out when not needed)
// sv_cheats "1"
// sv_infinite_ammo "2"
// mp_limitteams "0"
// mp_autoteambalance "0"
// mp_maxmoney "60000"
// mp_startmoney "60000"
// mp_buytime "9999"
// mp_buy_anywhere "1"
// mp_freezetime "0"
// mp_roundtime "60"
// mp_roundtime_defuse "60"

// SCRIPTS & ALIASES
alias "+jumpthrow" "+jump;-attack"
alias "-jumpthrow" "-jump"
bind "n" "+jumpthrow"

// AUTO-EXECUTE CONFIRMATION
echo ""
echo "╔══════════════════════════════╗"
echo "║ AUTOEXEC LOADED SUCCESSFULLY ║"
echo "╚══════════════════════════════╝"
echo ""

// FINAL COMMAND - ALWAYS KEEP THIS
host_writeconfig
Feel free to copy this configuration and modify it to suit your personal preferences. Remember that CS2 is a game of milliseconds—the right autoexec settings can make the difference between a clutch and a defeat.
Your Path to CS2 Mastery
Creating your perfect autoexec file is a journey of continuous refinement. Throughout my CS2 career, I’ve constantly tweaked and adjusted my settings to match my evolving playstyle. Whether you’re showing off your latest knife acquisition from the CS2 trading platform, showing your favorite skins from the CS2 marketplace or focusing on competitive performance, a well-crafted autoexec will enhance your gaming experience.
The beauty of autoexec files is their flexibility—you can add new commands as you discover them and remove ones that no longer serve your playstyle. I recommend keeping a backup of your autoexec file in cloud storage so you can quickly set up your perfect configuration on any computer.
Final Pro Tip: Ongoing Optimization
The perfect autoexec is never truly finished. I recommend keeping a note on your phone whenever you discover a new command or setting you want to try. After testing in casual matches, incorporate the best ones into your master config.
Pay attention to the configs that pro players share—they often contain cutting-edge optimizations that haven’t yet become common knowledge. Just remember that their settings are customized for their specific hardware and playstyle, so always adapt rather than blindly copy.
Start Small, Refine Often
Remember that building your perfect autoexec is an iterative process. Start with the essential commands in this guide, then gradually add and refine settings as you become more comfortable with how each command affects your gameplay.
Don’t feel obligated to use someone else’s exact settings—even pro configs. Your perfect setup should be tailored to your unique playing style, hardware capabilities, and personal preferences.
Happy fragging!
Frequently Asked Questions
Open the developer console in CS2 by pressing the tilde key (~) and type “exec autoexec” followed by pressing Enter. This manually executes all the commands in your autoexec file. For automatic execution every time you launch the game, add “+exec autoexec.cfg” to your launch options in Steam as described in this guide.
An autoexec file works as a personalized configuration script that automatically executes commands whenever you start CS2. It’s essentially a text file with a .cfg extension containing console commands that customize everything from crosshair appearance to network settings.
Absolutely—virtually every professional CS2 player uses a personalized autoexec file. Pros rely on these configs to maintain consistent settings across tournament PCs and practice environments. Their autoexec files typically include fine-tuned crosshair settings, specialized grenade binds, customized viewmodel positions, and network optimizations.
If your autoexec isn’t loading correctly, try these troubleshooting steps:
1) Verify the file is named exactly “autoexec.cfg” with no additional extensions,
2) Confirm it’s in the correct folder: Steam\steamapps\common\Counter-Strike Global Offensive\game\csgo\cfg,
3) Check your launch options include “+exec autoexec.cfg”,
4) Make sure the file permissions allow reading,
5) Add “host_writeconfig” as the last line in your autoexec, and
6) Try manually executing it by typing “exec autoexec” in the console. If all else fails, try creating a simple autoexec with just a few commands to test if it’s working.
Yes, you can include practice server commands in your autoexec, but I recommend keeping them commented out with // symbols at the beginning of each line when not in use. Commands like sv_cheats 1, sv_infinite_ammo 2, mp_freezetime 0, and mp_roundtime 60 are extremely useful for practicing nades, spray patterns, and executes.
Yes, your autoexec settings will typically survive CS2 updates, which is one of the primary benefits of using an autoexec file. Unlike settings changed through the in-game menu, which can sometimes be reset during major updates, your autoexec file remains untouched since it’s a separate file stored in your game directory. As long as you keep “+exec autoexec.cfg” in your launch options, your personalized settings will be applied every time you launch the game, even after updates.