With the release of Counter-Strike 2, every experienced CS:GO player who has a config file wants to transfer that file to CS2.
This guide will show you how to transfer your CS:GO config to CS2 in seconds. Additionally, we’ll discuss how to create a custom CS2 config file from scratch and fine-tune your settings for optimal gameplay.
Key Takeaways
- Learn how to transfer custom settings between CS:GO and CS2.
- Activate your transferred config file.
CS:GO and CS2 Config Location
Begin by navigating to your Steam folder.
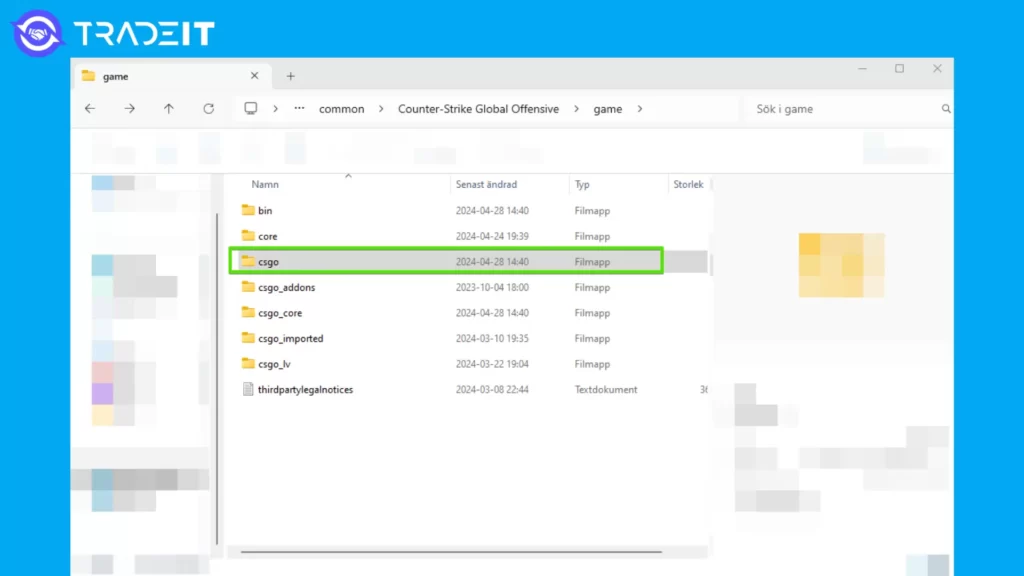
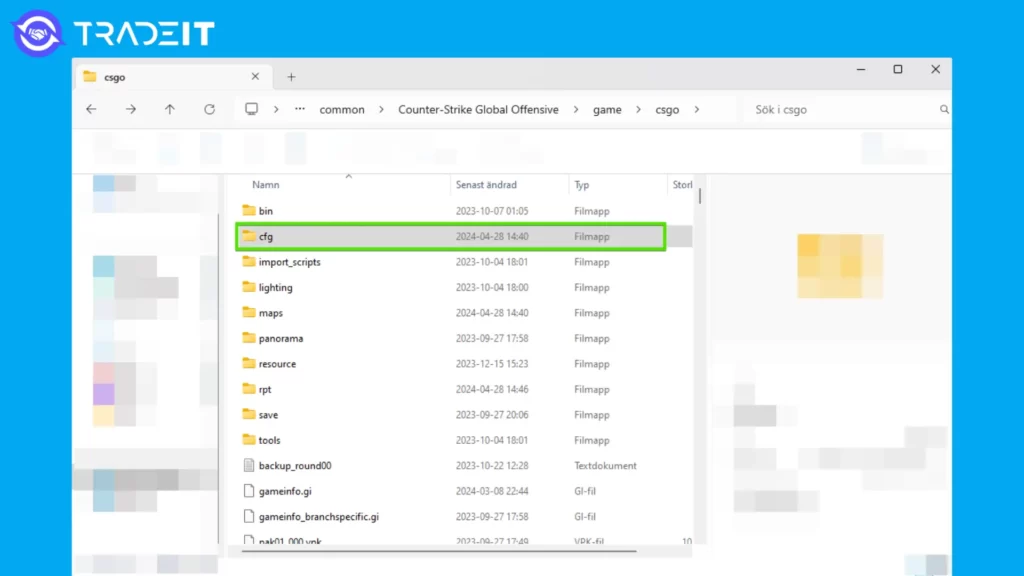
Go to ”Program Files (x86)” → ”Steam” → ”steamapps” → ”common” → ”Counter-Strike Global Offensive” → ”game” → ”csgo” → ”cfg”.
See images and steps below.
1. Go to ”My Computer” → Program (x86)
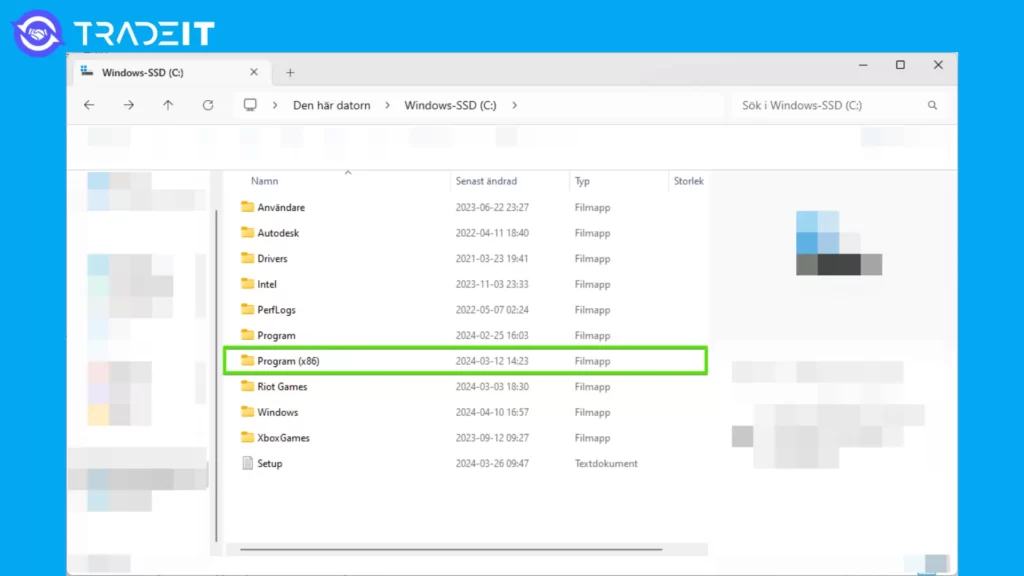
2. Locate ”Steam” folder
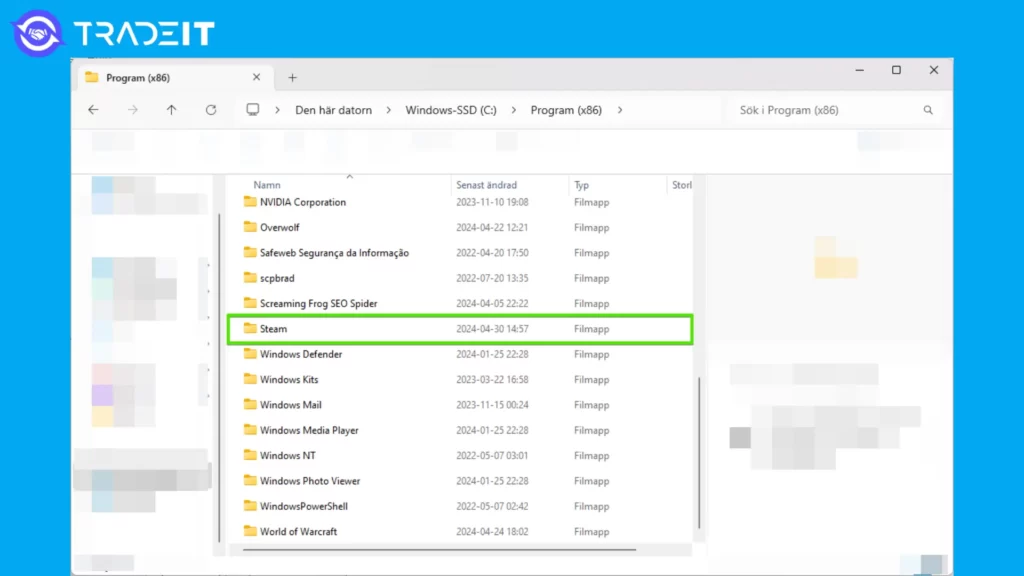
3. Navigate to ”steamapps”
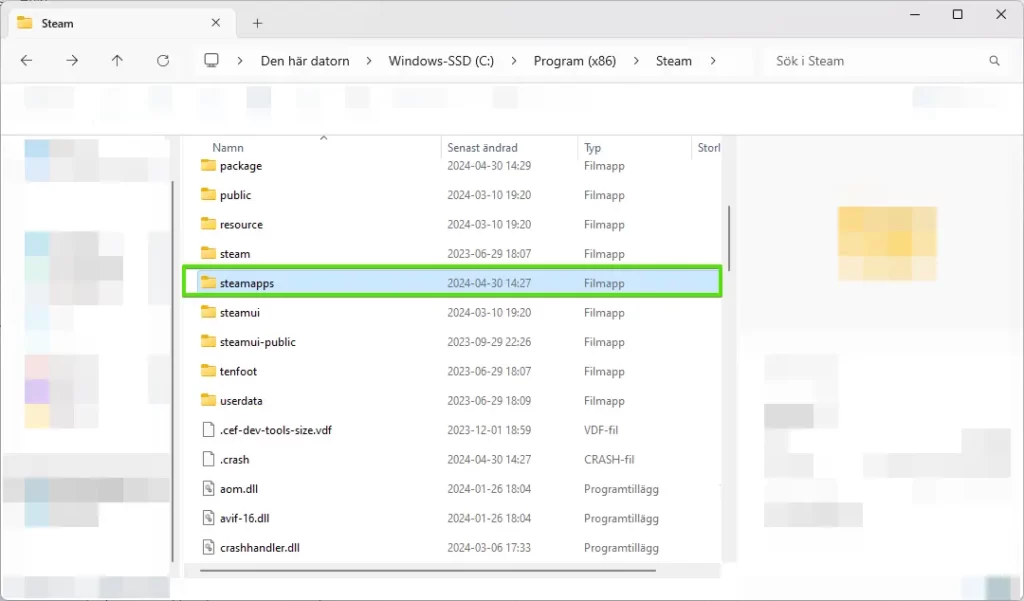
4. Open ”common” folder
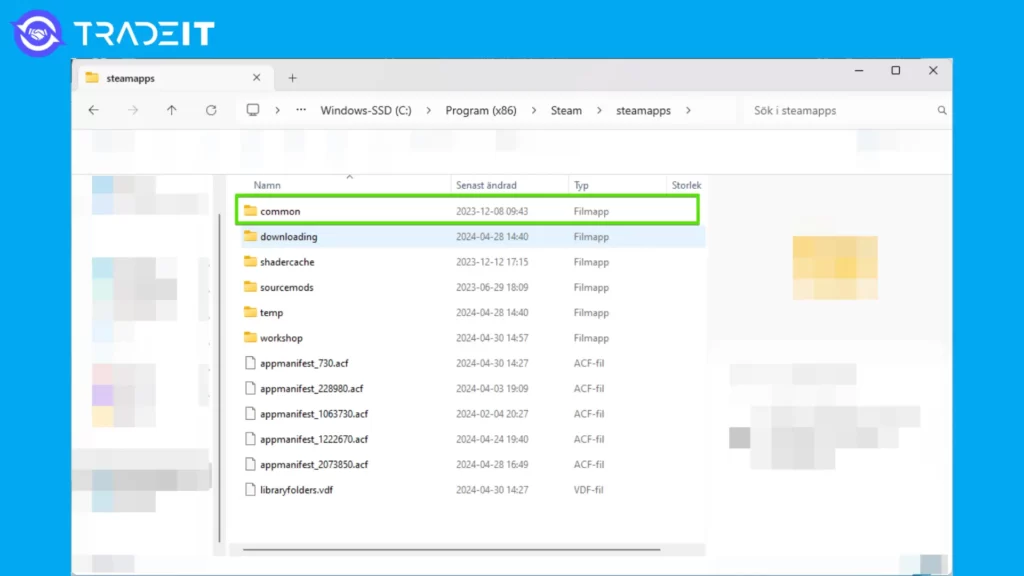
5. Go to ”Counter-Strike Global Offensive” folder
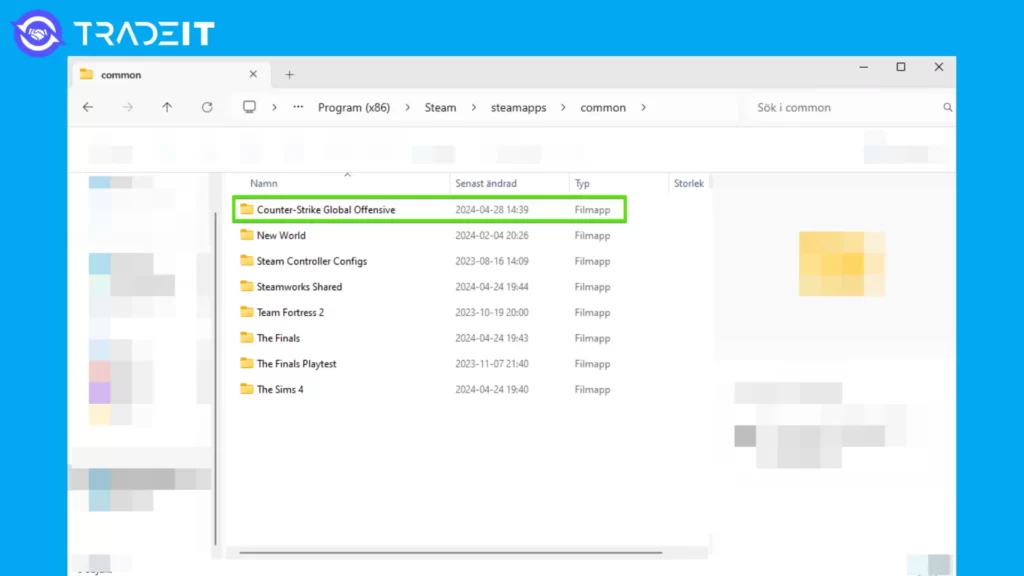
6. Press ”game” folder
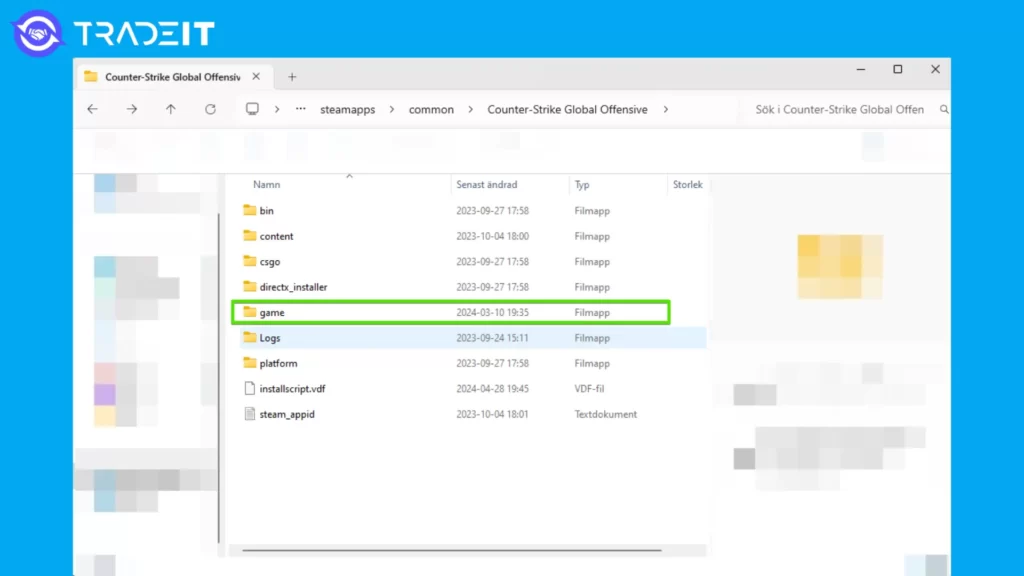
7. Enter ”csgo” folder
8. Finally, access ”cfg” folder
Before you can transfer your CS:GO config file to CS2, you must first locate it in the userdata folder within the Steam folder. The Steam folder is typically located in the Program Files (x86) directory on your computer.
Here is the complete path to CSGO config. Replace STEAM_ID with your Steam ID:
Program Files (x86)\Steam\userdata\STEAM_ID\730\local\cfg
The complete path to the correct CS2 config folder is this:
Program Files (x86)\Steam\steamapps\common\Counter-Strike Global Offensive\game\csgo\cfg
Transferring the CS:GO Config File to CS2

With your CS:GO config file at hand, you are now ready to transfer it to CS2. To do this, simply paste the config file into the designated CS2 folder where configurations are stored by following these steps:
- Copy the config file from your CS:GO folder.
- Paste the config file into the designated CS2 folder.
Activating Your Transferred CS:GO Config in CS2
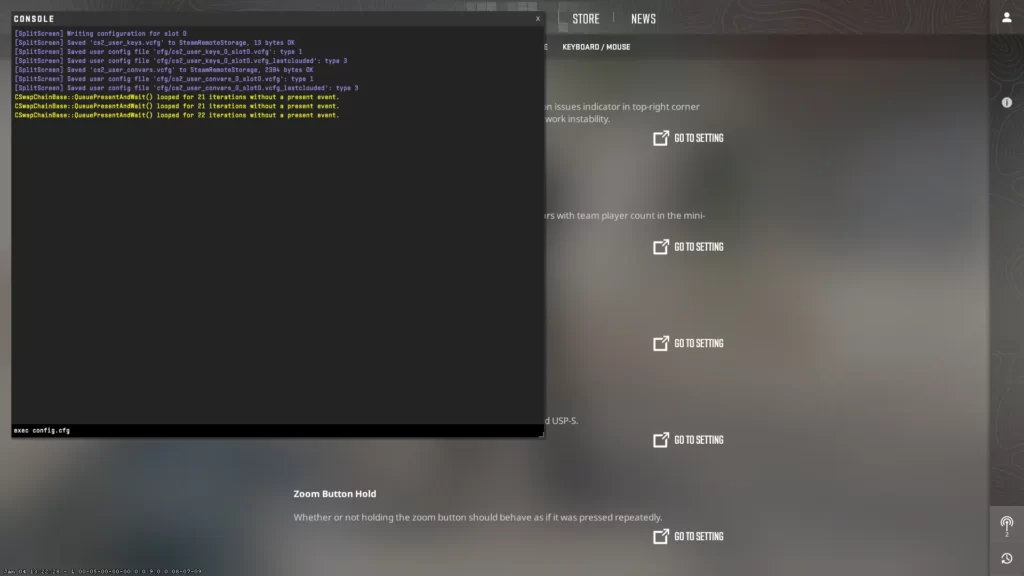
After transferring your CS:GO config file, it’s time to activate it in CS2. You can achieve this by opening the console in CS2 with the ~ key, typing “exec config.cfg”, and hitting enter.
Upon activating your transferred CS2 config in CS2, you can examine the console for any indications of errors or warnings to verify that the configuration has been successfully implemented.
Here’s how to open the developer console.
Summary
In this comprehensive guide, we have covered everything you need to know about transferring your CS:GO config to CS2.
Whether you choose to transfer your existing CS2 config or create a custom CS2 config from scratch, remember that fine-tuning your settings and experimenting with advanced console commands can significantly enhance your gameplay experience.
Other Topics You Might Be Interested In
- See a complete list of CS2 skins on Tradeit.
- Discover the most expensive CS2 skins.
- Discover the cheapest CS2 knife.
- Learn about the best knives in CS2.
- Discover the most expensive CS2 knife.
- Discover the cheapest CS2 skins.
Frequently Asked Questions
To load a config to CS2, locate the ‘local’ folder in your Steam userdata (in the ‘Program Files (x86)’ directory) and add your Steam ID number to the path. Right-click CS2 in your Steam Library, go to Properties -> General -> Launch Options, and then add +exec NAME.cfg (substituting NAME with your config file name) to the launch options. Configs are located in the Steam folder under Global Offensive’s files.
Yes, config files work in CS2. You can transfer your existing CS:GO config. However, some binds will need to be adjusted due to different code commands being used by CS2. Config files allow you to execute console commands and customize your settings.
The primary differences between CS:GO and CS2 config files are their file locations.
This is the path to your CS:GO config file:
Program Files (x86)\Steam\userdata\STEAM_ID\730\local\cfg
This is the path to your CS2 config folder:
Program Files (x86)\Steam\steamapps\common\Counter-Strike Global Offensive\game\csgo\cfg
Other Topics You Might Be Interested In
- Discover the best website to trade CS2 skins.
- Learn about the CS2 skin marketplace.


