Customizing your keybindings in CS2 can significantly improve your gameplay. Efficient key placement allows faster reactions, smoother movement, and better control during high-stakes matches.
Whether you’re a beginner or a seasoned player, knowing how to bind keys is essential. In this guide, we’ll cover two simple ways to bind keys in CS2, through the in-game settings and using the console.
Table of Contents
Method 1: Binding Keys via In-Game Settings

The most user-friendly method to bind keys is through CS2’s in-game menu. Here’s a step-by-step guide:
Launch CS2 and click the gear icon in the main menu to access Settings.
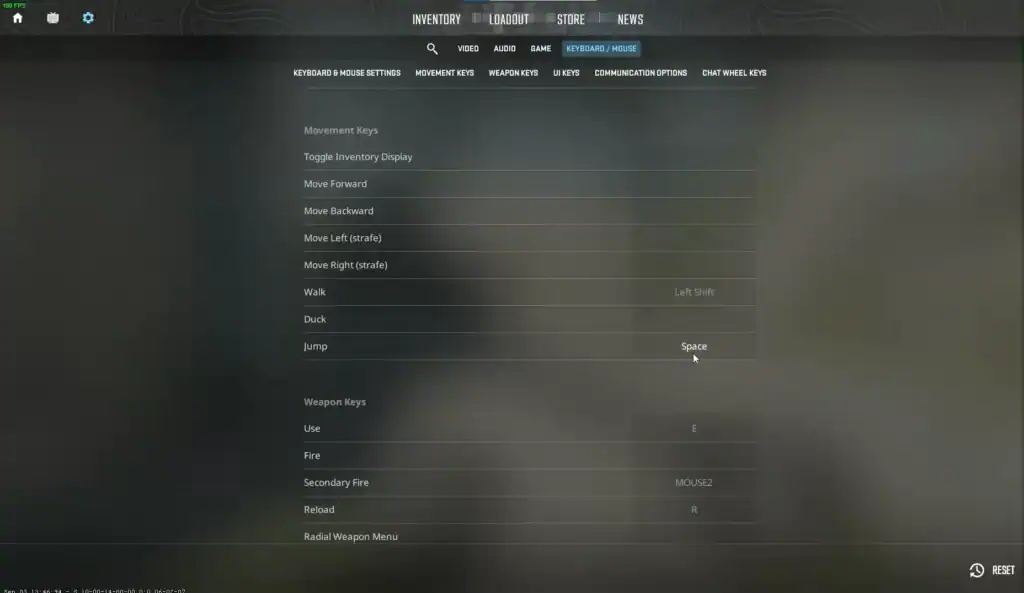
Navigate to the Keyboard/Mouse tab to see all current key assignments for movement, weapons, and other actions.
Scroll through the list to locate the action you want to bind, like jumping, crouching, reloading, or switching weapons.
Click the current key assignment, then press the desired key on your keyboard. For example, assign crouch to Ctrl or weapon slot to Q.
After assigning all desired keys, click “Apply” or “Save” to keep your new keybindings.
This method is straightforward and ideal for players who prefer a visual interface. It’s also safer since it prevents overwriting essential default keys.
Method 2: Binding Keys Using the Console

For more advanced customization, CS2 allows players to bind keys directly using the developer console. This method is faster once you get used to it and enables complex commands, like scripts or toggles.
Go to Settings → Game → Enable Developer Console (~) → Yes.
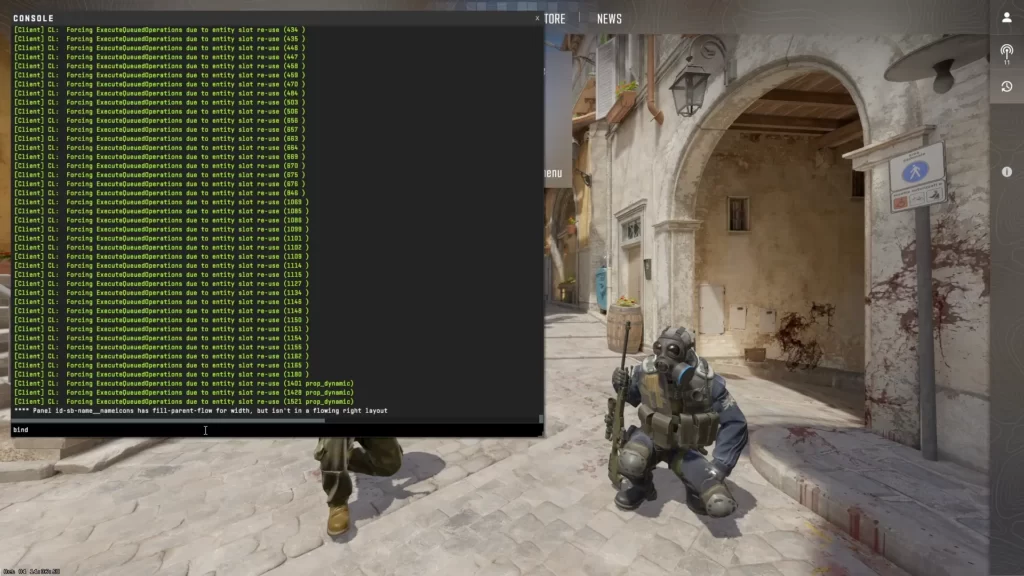
Press the ~ key while in-game to bring up the console window.
Type: bind "key" "action". Replace “key” with your chosen key and “action” with the function. Example: bind "F" "use weapon_knife".
Use unbind "key" to remove any binding and free the key for a new assignment.
Advanced players often save keybindings to autoexec.cfg so they load automatically every time the game starts.
The console method is particularly useful for repetitive actions or for players who use multiple scripts. It also allows for more precise control over every function in CS2.
Final Tips
Spend a few minutes in a practice match to ensure your new setup feels natural and responsive.
Try not to change keybindings frequently. Muscle memory is critical for fast reactions in competitive play.
If you’re unsure about custom setups, start with default keys and gradually tweak them to your preference.
By using either of these two simple methods, you can quickly optimize your gameplay in CS2.
Whether you prefer a visual interface or the flexibility of console commands, binding your keys correctly will help you react faster, play smarter, and gain a competitive edge.
FAQs
1. What is the easiest way to bind keys in CS2?
The easiest way is through the in-game settings under the Keyboard/Mouse tab. You can click on any action and assign a new key without using the console.
2. How do I bind keys using the console?
Open the developer console (~), then type bind "key" "action". Replace "key" with the key you want and "action" with the function. For example: bind "F" "use weapon_knife".
3. Can I unbind a key if I make a mistake?
Yes, use the command unbind "key" in the console to free up any key for reassignment.
4. Do keybindings save automatically?
Keybindings save when you apply them in the in-game settings. For console bindings, you can save them permanently in an autoexec.cfg file.
5. How can I test if my new keybindings work?
Start a practice match or a local server and perform the actions you bound. Make adjustments if any key feels awkward or doesn’t respond as expected.


